vscode-flutter.xml-layout
XML Layout for Flutter. Brings Angular's style to Flutter!
Imagine that you can do this :
<Container width="50 | widthPercent"
           height="50 | heightPercent"
           color="blue"
           :text="'Hello world!'"
           :opacity=".9"
           :center
           :if="ctrl.textVisible | behavior" />
Instead of this:
    final size = MediaQuery.of(context).size;
    final __widget = StreamBuilder(
      initialData: ctrl.textVisible.value,
      stream: ctrl.textVisible,
      builder: (BuildContext context, snapshot) {
        if (snapshot.data) {
          return Opacity(
            opacity: .9,
            child: Center(
              child: Container(
                color: Colors.blue,
                height: (size.height * 50) / 100.0,
                width: (size.width * 50) / 100.0,
                child: Text(
                  'Hello world!'
                )
              )
            )
          );
        }
        else {
          return Container(width: 0, height: 0);
        }
      }
    );
    return __widget;
Which is about 20 lines of code, and if you just updated the :text property to use a stream variable :text="ctrl.myTextStream | stream" that will add another 4 lines of code for the StreamBuilder.
Extension features:
- Separates UI code (widget and widget's state) from the business logic.
- Brings some Angular's features like pipes, conditionals...
- Provides built-in properties & pipes to make the coding much easier.
- Generates localization code depending on json files.
- Forms & animation made easy.
- Customizable! so developers can add their own properties and modify some features.
- Supports Code completion, hover information, Go to Definition, diagnostics and code actions.
Example
Get Started
- Install the extension from vscode marketplace
- Create a new flutter project
- Install prerequisites packages:
- flutter_xmllayout_helpers
- provider
- flutter_localizations
dependencies:
  flutter:
    sdk: flutter
  flutter_localizations:
    sdk: flutter
  provider: ^3.0.0+1
  flutter_xmllayout_helpers: ^0.0.9
- Apply one of the following steps:
- Clear all
main.dartcontent then usefxml_appsnippet to create the app. - Modify
main.dartto useMultiProviderfromproviderpackage:- Register
PipeProvider(fromflutter_xmllayout_helperspackage) as a provider. - Register
RouteObserver<Route>as a provider (only if you want to use RouteAware events in your widgets' controllers).
- Register
- Clear all
Localization:
- Create
i18nfolder insidelibfolder and add JSON files named with locale codes e.g.en.json. - Import
i18n/gen/delegate.dartin the main file. - Register
AppLocalizationsDelegate()inlocalizationsDelegatesparameter of theMaterialApp. - To use localized text in the UI see Pipes docs.
XML layout:
- Create a new folder and name it as your page/widget name e.g.
home. - Then create home.xml file inside
homefolder. - Use
fxml_widgetsnippet to create the starter layout, modify it as you want then save it. the extension will generate a file namedhome.xml.dartwhich contains UI code, andhome.ctrl.dartfile (if not exists) that contains the controller class which is the place you should put your code in (will be generated only if you addedcontrollerproperty).
Example:
<HomePage controller="HomeController" routeAware
    xmlns:cupertino="package:flutter/cupertino.dart">

  <Scaffold>

    <appBar>
      <AppBar>
        <title>
          <Text text="'Home'" />
        </title>
      </AppBar>
    </appBar>

    <body>
      <Column mainAxisAlignment="center" crossAxisAlignment="center">
        <Image :use="asset" source="'assets/my_logo.png'" />
        <Text text="'Hello world!'" />
        <Icon icon="CupertinoIcons.home" />
      </Column>
    </body>
  </Scaffold>
</HomePage>
HomePage (root element) the name of your widget.
controller an optional property, the controller name you want to generate.
routeAware an optional property, which generates navigation events (didPush(), didPop(), didPushNext() and didPopNext()).
xmlns:* an optional property(s) used to import packges and files to be used in HomePage class. (in this example we imported cupertino.dart to use CupertinoIcons).
Controller:
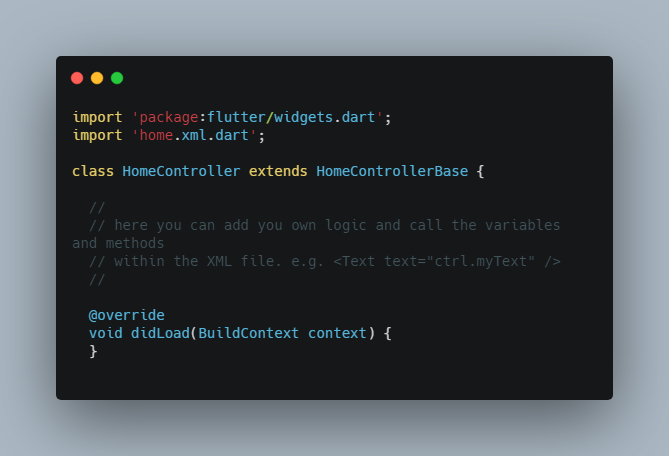
If you added a controller property to your widget then will be generated (if not exists), the file looks like this:
import 'package:flutter/widgets.dart';
import 'home.xml.dart';

class HomeController extends HomeControllerBase {

  //
  // here you can add you own logic and call the variables and methods
  // within the XML file. e.g. <Text text="ctrl.myText" />
  //

  @override
  void didLoad(BuildContext context) {
  }

  @override
  void onBuild(BuildContext context) {
  }

  @override
  void afterFirstBuild(BuildContext context) {
  }

  @override
  void dispose() {
    super.dispose();
  }
}
