A UI for roop
Features:
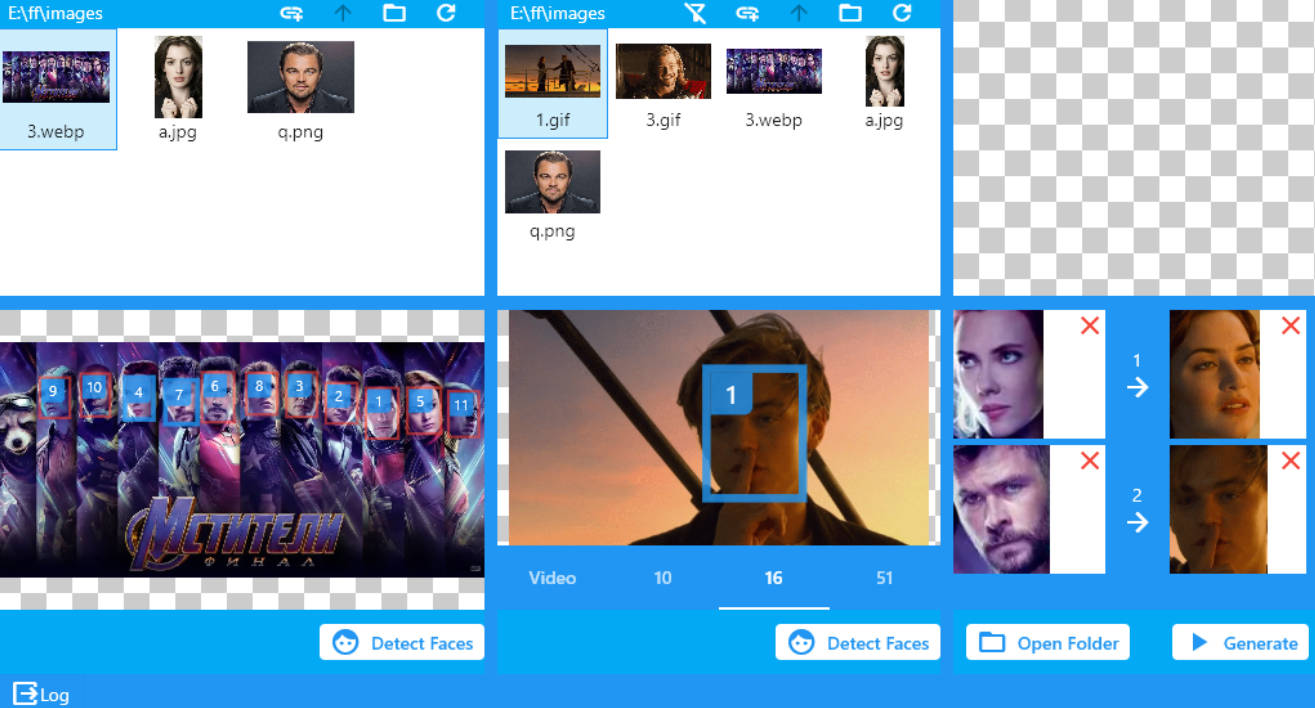
1. Support for images, gifs, videos
2. Allows swapping faces with specified faces

First run:
1. Make sure the roop project(version: 1.3.2) can run successfully.
2. Create a new folder, e.g., E:\ff (this path will be used throughout the instructions).
3. Download the faceswap release version and extract it to the folder: E:\ff\faceswap
4. Copy the server.py from the source code to the root directory of the roop project
5. Copy the runServer.bat from the source code to E:\ff\runServer.bat
6. Modify the runServer.bat according to your environment
For example, if you are using minoconda installed at G:\minoconda3\ , the content should be as follows:
chcp 65001>nul
call G:\miniconda3\Scripts\activate.bat G:\miniconda3
call conda activate roop
pushd D:\roop\roop
python -u server.py %1
The %1 represents the local server port number.
You can use other methods as well as long as server.py runs correctly.
7. Run E:\ff\fceswap\fceswap.exe
If successful, a command prompt window will appear upon startup, as shown below:

If any other errors appear, check the configuration based on the provided instructions.
Usage: