Put Flutter to Work ?
Hello!
This project is a demo intended to help people test drive Flutter by integrating it into their existing applications.
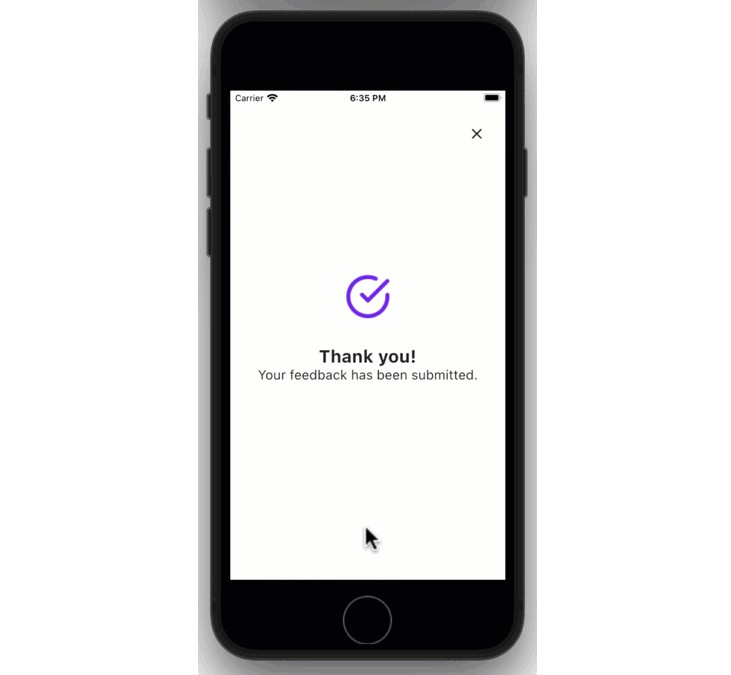
Included in this repo is a Flutter add-to-app module, which contains the UI and logic for displaying a popup to capture user feedback (a “net promoter score”). Alongside the module are three newsfeed applications for iOS, Android, and web, built with SwiftUI, Kotlin, and Angular, respectively.
The applications demonstrate how to import a Flutter module and display it using native platform code. If you’re looking to learn, for example, how to wire up a UI element in Swift to navigate to content displayed with Flutter, the iOS newsfeed app can show you.
If you’d like to try Flutter in your own applications, you can download a prebuilt copy of the Flutter module for Android, iOS, or web from this repo, and follow the instructions below to integrate it into your own apps. Note that you don’t need the Flutter SDK installed on your development machine for these to work!
Downloading and using the pre-compiled Flutter module
iOS
Full instructions for adding a module to an existing iOS app are available in the add-to-app documentation at flutter.dev, but you can find the short version for both Swift and Objective-C below.
Link the Flutter module into your application
-
Download a recent framework build of the Flutter module from this repo.
-
Unzip the archive into the root of your project directory. It will create a directory there called
flutter-frameworkcontaining the compiled Flutter module. -
Open the
flutter-framework/Releasedirectory and dragApp.xcframeworkandFlutter.xcframeworkto the General > Frameworks, Libraries, and Embedded Content section of your app target in Xcode.
Update your app’s code to show Flutter
Once the Flutter module is linked into your application, you’re ready to fire up an instance of the Flutter engine and present the Flutter view controller.
Swift
In AppDelegate.swift, add the following three lines marked as “NEW”:
import UIKit
import Flutter // NEW!

@UIApplicationMain
class AppDelegate: FlutterAppDelegate {
  lazy var flutterEngine = FlutterEngine(name: "my flutter engine")  // NEW!

  override func application(_ application: UIApplication, didFinishLaunchingWithOptions launchOptions: [UIApplication.LaunchOptionsKey: Any]?) -> Bool {
    flutterEngine.run();  // NEW!
    return super.application(application, didFinishLaunchingWithOptions: launchOptions);
  }
}
Then, in a ViewController class somewhere in your app, call these three lines of code to present the Flutter module’s UI:
let flutterEngine = (UIApplication.shared.delegate as! AppDelegate).flutterEngine
let flutterViewController =
    FlutterViewController(engine: flutterEngine, nibName: nil, bundle: nil)
present(flutterViewController, animated: true, completion: nil)
For a demo, it’s usually best to call these in response to a UI event like a button press. Once they’re executed, the net promoter score UI will appear in your app!
Objective-C
In AppDelegate.h, add this import:
@import Flutter;
and this property to the AppDelegate interface:
@property (nonatomic,strong) FlutterEngine *flutterEngine;
Next, in AppDelegate.m, add these two lines to
didFinishLaunchingWithOptions:
  self.flutterEngine = [[FlutterEngine alloc] initWithName:@"my flutter engine"];
  [self.flutterEngine run];
Then, somewhere in a UIViewController class in your app, @import Flutter and
call these lines of code:
FlutterEngine *flutterEngine =
    ((AppDelegate *)UIApplication.sharedApplication.delegate).flutterEngine;
FlutterViewController *flutterViewController =
    [[FlutterViewController alloc] initWithEngine:flutterEngine nibName:nil bundle:nil];
[self presentViewController:flutterViewController animated:YES completion:nil];
For a demo, it’s usually best to call these in response to a UI event like a button press. Once they’re executed, the net promoter score UI will appear in your app!
Android
Full instructions for adding a module to an existing Android app are available in the add-to-app documentation at flutter.dev, but you can find the short version for both Kotlin and Java below.
Import the Flutter module into your app’s codebase
First, download a recent aar build of the Flutter module
from this repo. Then, create a directory in the root of your project called
flutter and unzip the archive into that directory.
Next, add the following entries to the repositories and dependencies sections
to your app/build.gradle file:
repositories {
  // Add these two maven entries.
  maven {
    url '../flutter'
  }
  maven {
    url 'https://storage.googleapis.com/download.flutter.io'
  }
}

dependencies {
  // Add these three entries.
  debugImplementation 'com.example.flutter_module:flutter_debug:1.0'
  profileImplementation 'com.example.flutter_module:flutter_profile:1.0'
  releaseImplementation 'com.example.flutter_module:flutter_release:1.0'
}
Update your app’s code to show Flutter
Once the Flutter module is linked into your application, fire up an instance of the Flutter engine and present the Flutter Activity.
Kotlin
In your app’s Application class, add a property for a Flutter engine:
lateinit var flutterEngine : FlutterEngine
In onCreate, instantiate and cache a running Flutter engine with this
code:
// Instantiate a FlutterEngine.
flutterEngine = FlutterEngine(this)

// Start executing Dart code to pre-warm the FlutterEngine.
flutterEngine.dartExecutor.executeDartEntrypoint(
  DartExecutor.DartEntrypoint.createDefault()
)

// Cache the FlutterEngine to be used by FlutterActivity.
FlutterEngineCache
  .getInstance()
  .put("my_engine_id", flutterEngine)
Then, in an Activity class somewhere in your app, call these four lines of code to launch the Flutter module’s UI:
startActivity(
  FlutterActivity
    .withCachedEngine("my_engine_id")
    .build(this)
)
For a demo, it’s usually best to call these in response to a UI event like a button press. Once they’re executed, the net promoter score UI will appear in your app!
Java
In your app’s Application class, add a property for a Flutter engine:
public FlutterEngine flutterEngine;
In onCreate, instantiate and cache a running Flutter engine with this
code:
// Instantiate a FlutterEngine.
flutterEngine = new FlutterEngine(this);

// Start executing Dart code to pre-warm the FlutterEngine.
flutterEngine.getDartExecutor().executeDartEntrypoint(
  DartEntrypoint.createDefault()
);

// Cache the FlutterEngine to be used by FlutterActivity.
FlutterEngineCache
    .getInstance()
    .put("my_engine_id", flutterEngine);
Then, in an Activity class somewhere in your app, call these four lines of code to launch the Flutter module’s UI:
startActivity(
  FlutterActivity
    .withCachedEngine("my_engine_id")
    .build(currentActivity)
  );
For a demo, it’s usually best to call these in response to a UI event like a button press. Once they’re executed, the net promoter score UI will appear in your app!
Web
There are nearly as many ways to build a website as there are published websites, so to a certain extent the “right” way to integrate the Flutter module into your site will depend on the particular client-side technologies you’re using (Angular, React, Vue, etc.) and the server you’re using to host your content (Firebase Hosting, nginx, etc.).
It’s not possible to cover all of the possibilities here, but the basic approach is roughly the same for any of them:
-
Download a recent web build of the Flutter module from this repo.
-
Unzip the archive into a folder somewhere within your project’s source tree where it will be picked up and served by the server technology you’re using (in the “public” folder of a Firebase Hosting project, for example).
-
Add an iframe to one of the pages in your site, and set its src URL to point to the
index.htmlfile inside theweb-project-flutterfolder created when unzipping the archive in the previous step. -
Add client-side code to the same page to display the iframe in response to a convenient UI event, such as a button press.
Angular
The sample web application in this repo is built with Angular, and can serve as a model for web integrations. If you’re also running Angular, follow the steps below to integrate the model into your project.
First, download a recent web build of the Flutter module and
unzip it into the src directory of your project.
Next, change <base href="/"> to <base href="./"> in
src/web-project-flutter/index.html.
Then update angular.json to include the new files:
"assets": [
    "src/favicon.ico",
    "src/assets",
    "src/web-project-flutter"
],
Add an iframe
<iframe src="./web-project-flutter/index.html"> </iframe>
Move to your Angular project directory and run:
npm install or npm install --legacy-peed-deps depending on your npm
dependencies.
Finally, run ng serve to start the application.


