AutoSizeText
Flutter widget that automatically resizes text to fit perfectly within its bounds.
Show some ❤️ and star the repo to support the project
Usage
AutoSizeText behaves exactly like a Text. The only difference is that it resizes text to fit within its bounds.
AutoSizeText(
  "The text to display",
  style: TextStyle(fontSize: 20.0),
  maxLines: 2,
)
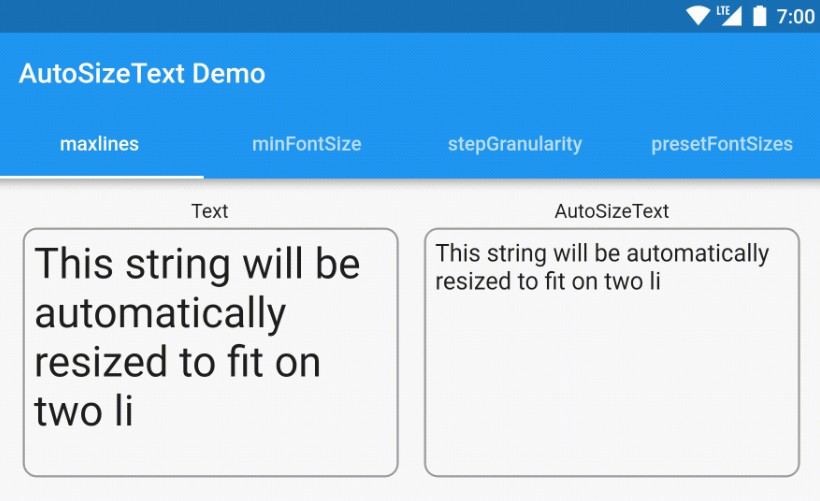
maxLines
The maxLines parameter works like you are used to with the Text widget. If there is no maxLines parameter specified, the AutoSizeText only fits the text according to the available width and height.
AutoSizeText(
  "A really long String",
  style: TextStyle(fontSize: 30.0),
  maxLines: 2,
)
Sample above
minFontSize & maxFontSize
The AutoSizeText starts with TextStyle.fontSize. It measures the resulting text and rescales it to fit within its bonds. You can however set the allowed range of the resulting font size.
With minFontSize you can specify the smallest possible font size. If the text still doesn't fit, it will be handled according to overflow. The default minFontSize is 12.0.
maxFontSize sets the largest possible font size. This is useful if the TextStyle inherits the font size and you want to constrain it.
AutoSizeText(
  "A really long String",
  style: TextStyle(fontSize: 30.0),
  minFontSize: 18.0,
  maxLines: 4,
  overflow: TextOverflow.ellipsis,
)

stepGranularity
The AutoSizeText will try each font size, starting with TextStyle.fontSize until the text fits within its bounds.
stepGranularity specifies how much the font size is decreased each step. Usually, this value should not be below 1.0 for best performance.
AutoSizeText(
  "A really long String",
  style: TextStyle(fontSize: 40.0),
  minFontSize: 10.0,
  stepGranularity: 10.0,
  maxLines: 4,
  overflow: TextOverflow.ellipsis,
)

presetFontSizes
If you want to allow only specific font sizes, you can set them with presetFontSizes.
If presetFontSizes is set, minFontSize, maxFontSize and stepGranularity will be ignored.
AutoSizeText(
  "A really long String",
  presetFontSizes: [40.0, 20.0, 14.0],
  maxLines: 4,
)

Rich Text
You can also use Rich Text (like different text styles or links) with AutoSizeText. Just use the AutoSizeText.rich() constructor
(which works exactly like the Text.rich() constructor).
The only thing you have to be aware of is how the font size calculation works: The fontSize in the style
parameter of AutoSizeText (or the inherited fontSize if none is set) is used as reference.
For example:
AutoSizeText.rich(
  TextSpan(text: "A really long String"),
  style: TextStyle(fontSize: 20.0),
  minFontSize: 5.0,
)
The text will be at least 1/4 of its original size (5 / 20 = 1/4).
But it does not mean that all TextSpans have at least font size 5.0.

Performance
AutoSizeText is really fast. Nevertheless you should not use an unreasonable high fontSize in your TextStyle. E.g. don't set the fontSize to 1000.0 if you know, that the text will never be larger than 30.0.
If your font size has a large range, consider increasing stepGranularity.
Troubleshooting
If AutoSizeText overflows or does not resize the text, you should check if it has constraint width / height.
Wrong code:
class MyPage extends StatelessWidget {
  @override
  Widget build(BuildContext context) {
    return Row(
      children: <Widget>[
        AutoSizeText(
          "Here is a very long text, which should be resized",
          maxLines: 1,
        ),
      ],
    );
  }
}
Because Row does not constrain the width of its children, the text will overflow.
Correct code:
class MyPage extends StatelessWidget {
  @override
  Widget build(BuildContext context) {
    return Row(
      children: <Widget>[
        Expanded( // Constrains AutoSizeText to the width of the Row
          child: AutoSizeText(
            "Here is a very long text, which should be resized",
            maxLines: 1,
          )
        ),
      ],
    );
  }
}