Auto App Translate
A library that screenshots by language and then creates and distributes store images by language.

How to Use?
0. prepare
The following libraries must be set up to apply this library
1. create android / ios emulator
it should be made to fit the size of the store. please refer this link
android
- open android studio
- tools – Device Manager – Create Device – New Hardware Profile
- Samsung Galaxy S10
- Device Name: Samsung Galaxy S10
- Screen – Resolution: 1440 x 3040
- click next until “Verify Configuration” step
- click “Show Advanced Settings”
- Emulated Performance – Boot option: Cold Boot
- Memory and Storage – Internal Storage: more then 2000MB
- nexus_9
- Device Name: nexus_9
- Screen – Resolution: 1536 x 2048
- click next until “Verify Configuration” step
- click “Show Advanced Settings”
- Emulated Performance – Boot option: Cold Boot
- Memory and Storage – Internal Storage: more then 2000MB
- Samsung Galaxy S10
ios
- open xcode
- window in the menu bar
- click “devices and simulators”
- click “Simulator” in the top left
- click “+” in the bottom left
- add
- iPhone 8
- iPhone 8 Plus
- iPad Pro (12.9-inch) (2rd generation)
- iPhone 13 Pro Max
2. set the gitingore.
- Because there are hundreds of images, you need to exclude those images from git.
/auto_translation/screenshots/
/auto_translation/framed/
/auto_translation/metadata/
3. Set the scene of the screenshot in the app
- before taking a screenshot, you need to set which screen to take a screenshot.
1. download text_drive.zip file, and put it in the project root directory.
- Please set the part you want to screenshot and insert the screenshot code. Please refer to the official document for details.
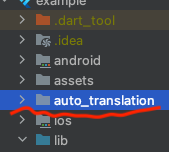
2. create “auto_translate” directory in the project root directory.
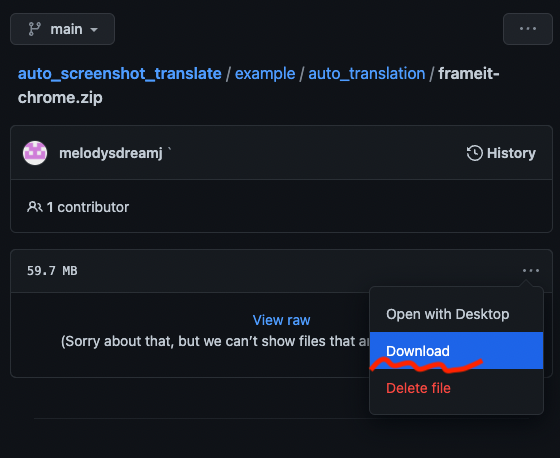
3. download frameit-chrome.zip folder, and put it in the “auto_translate” directory.
4. create “make_screenshot.dart” file in the “auto_translate” directory and write the following code.
import 'dart:io';

import 'package:emulators/emulators.dart';
import 'package:auto_screenshot_translate/callable/core_my/my_language_code/entity/flutter_support_language_for_screenshot.dart';

Future<void> main() async {
   // Create the config instance
   final emu = await Emulators.build();

   // Shutdown all the running emulators
   await emu.shutdownAll();

   // For each emulator in the list, we run `flutter drive`.
   await emu.forEach([
      'nexus_9',
      'Samsung_Galaxy_S10',
      'iPhone 8 Plus',
      'iPhone 8',
      'iPad Pro (12.9-inch) (5th generation)',
      'iPhone 13 Pro Max',
   ])((device) async {
      for (final c in flutterLocalizeSupportLanguagesForScreenShot) {
         final p = await emu.drive(
            device,
            'test_driver/main.dart',
            config: c,
         );
         stderr.addStream(p.stderr);
         await stdout.addStream(p.stdout);
      }
   });
}
5. Open the terminal in the project root and enter the following to create a screenshots.
dart auto_translation/make_screenshots.dart
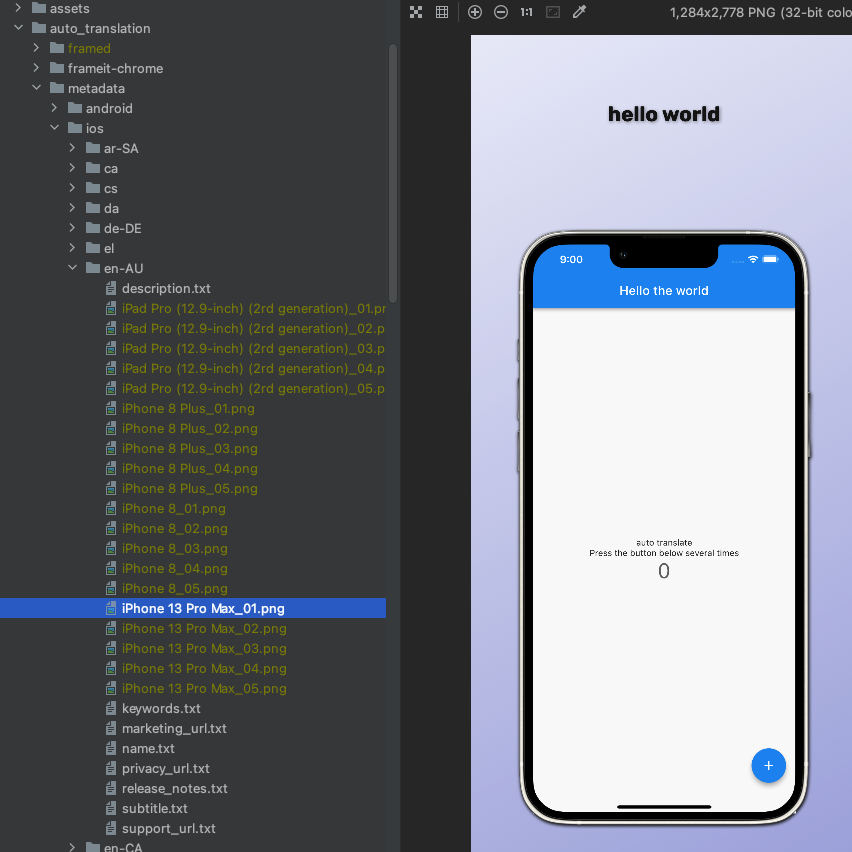
6. you can see the screenshots in the “auto_translation/screenshots” directory.

7. remove underbar in the file name of the galaxy screenshots.
- create dart file name is “frame_galaxy_remove_under_bar.dart” in the “auto_translate” directory and write the following code.
import 'package:auto_screenshot_translate/auto_screenshot_translate.dart';

Future<void> main() async {
  AutoScreenshotTranslate.removeUnderBarInGalaxy();
}
- run this file in the terminal.
dart auto_translation/frame_galaxy_remove_under_bar.dart
8. prepare screenshot title for generate store images.
- create dart file name is “frame_prepare.dart” in the “auto_translate” directory and write the following code.
import 'package:auto_screenshot_translate/auto_screenshot_translate.dart';
import 'package:auto_screenshot_translate/callable/core_my/my_screenshot_helper/entity/my_screenshot_info.dart';

Future<void> main() async {
  MyScreenshotInfo myScreenshotInfo = MyScreenshotInfo(
    // not use
    screenshotTitle01: "",
    screenshotTitle02: "",
    screenshotTitle03: "",
    screenshotTitle04: "",
    screenshotTitle05: "",

    // using (screenshot top text)
    screenshotSubTitle01: "",
    screenshotSubTitle02: "",
    screenshotSubTitle03: "",
    screenshotSubTitle04: "",
    screenshotSubTitle05: "",

    // screenshot start language for translate
    screenshotStartLanguageCode: "en",
  );

  AutoScreenshotTranslate.prepareGenerateScreenshotFrame(myScreenshotInfo);
}
- Fill in the screenshotSubTitle0~ with the instructions you want to use and run the code below at the project root terminal.
dart auto_translation/frame_prepare.dart
- after translate, you can see “keyword.strings” file in the auto_translation/screenshots directory.

9. Enter the following command in the project root terminal to generate store images.
dart auto_translation/frameit-chrome/bin/frameit_chrome.dart
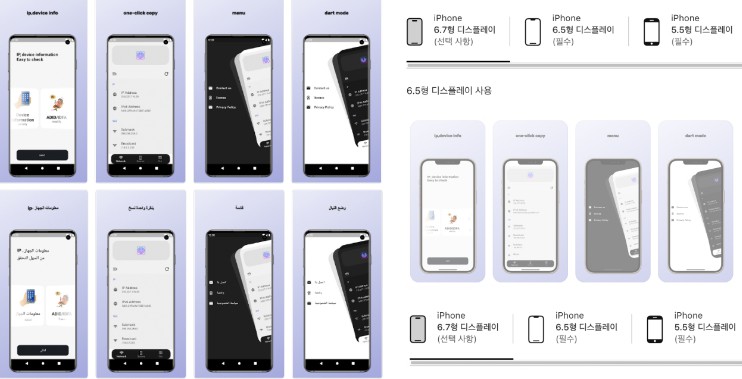
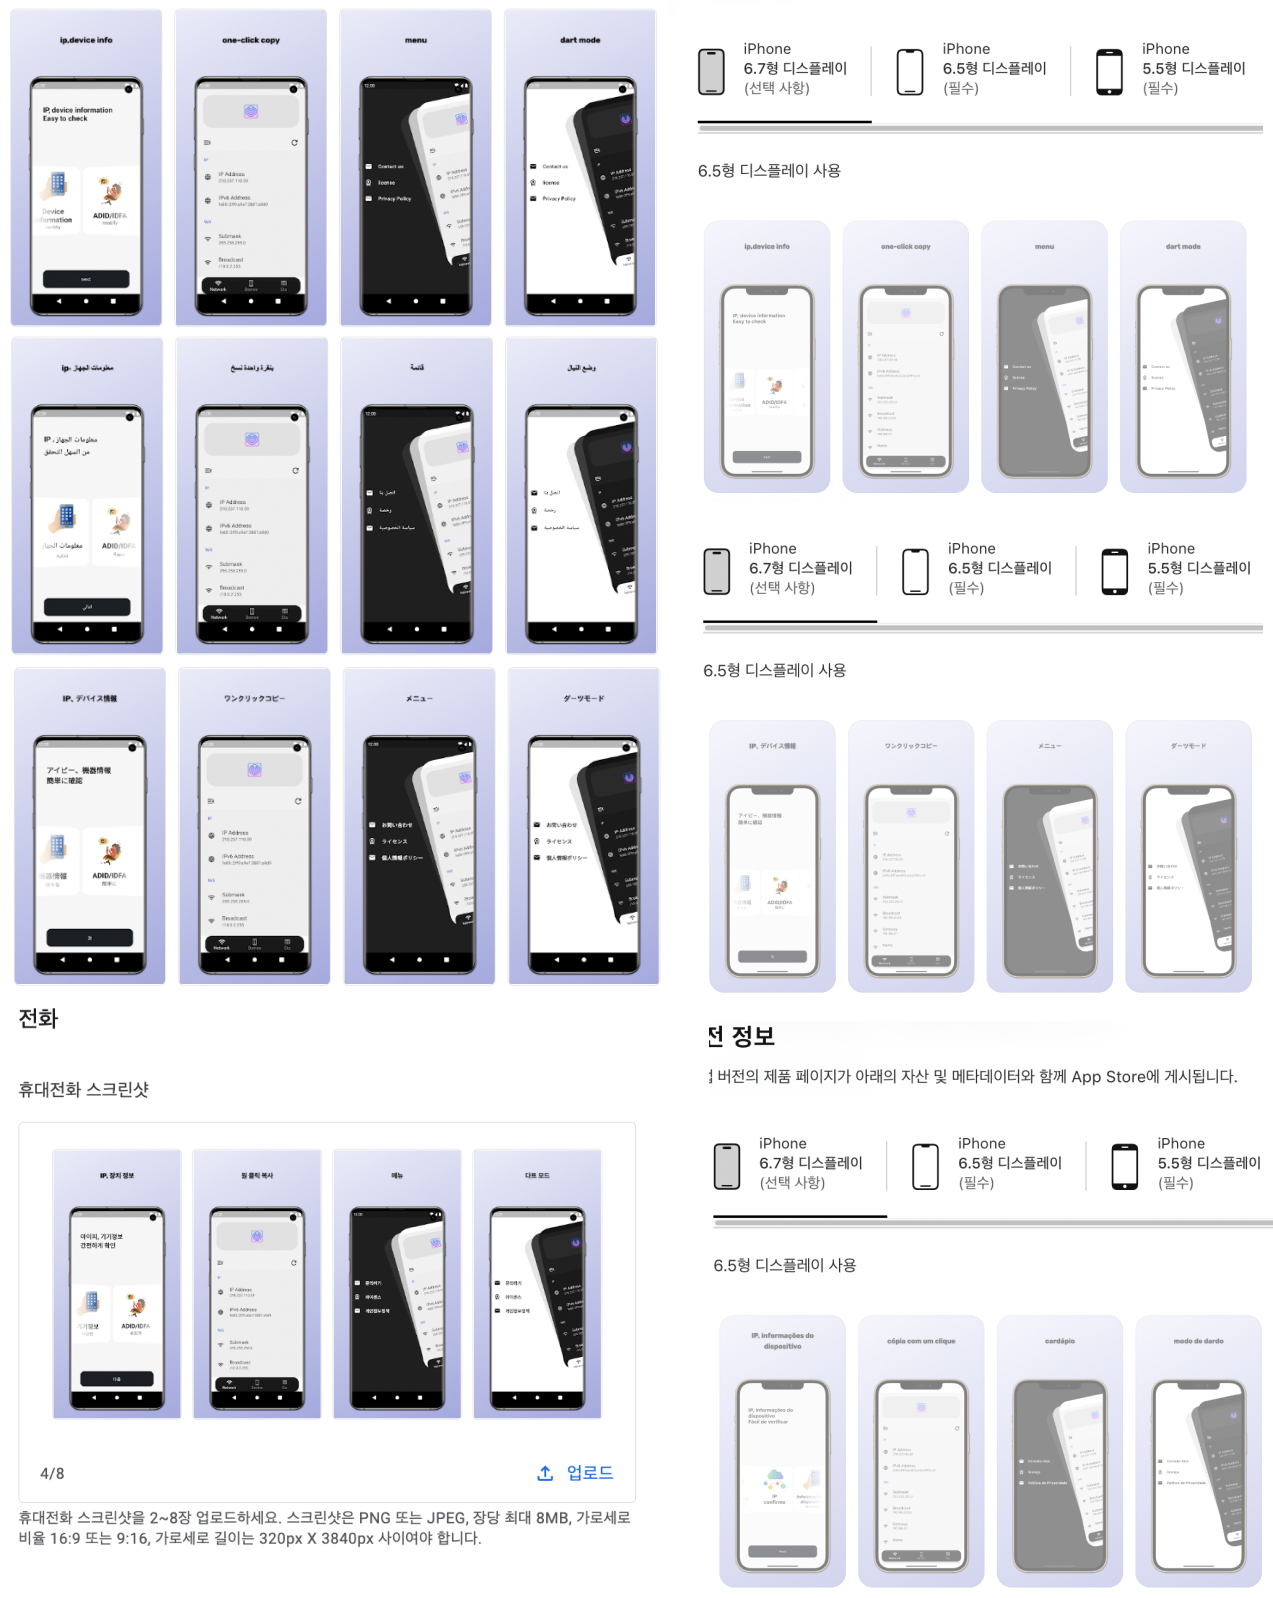
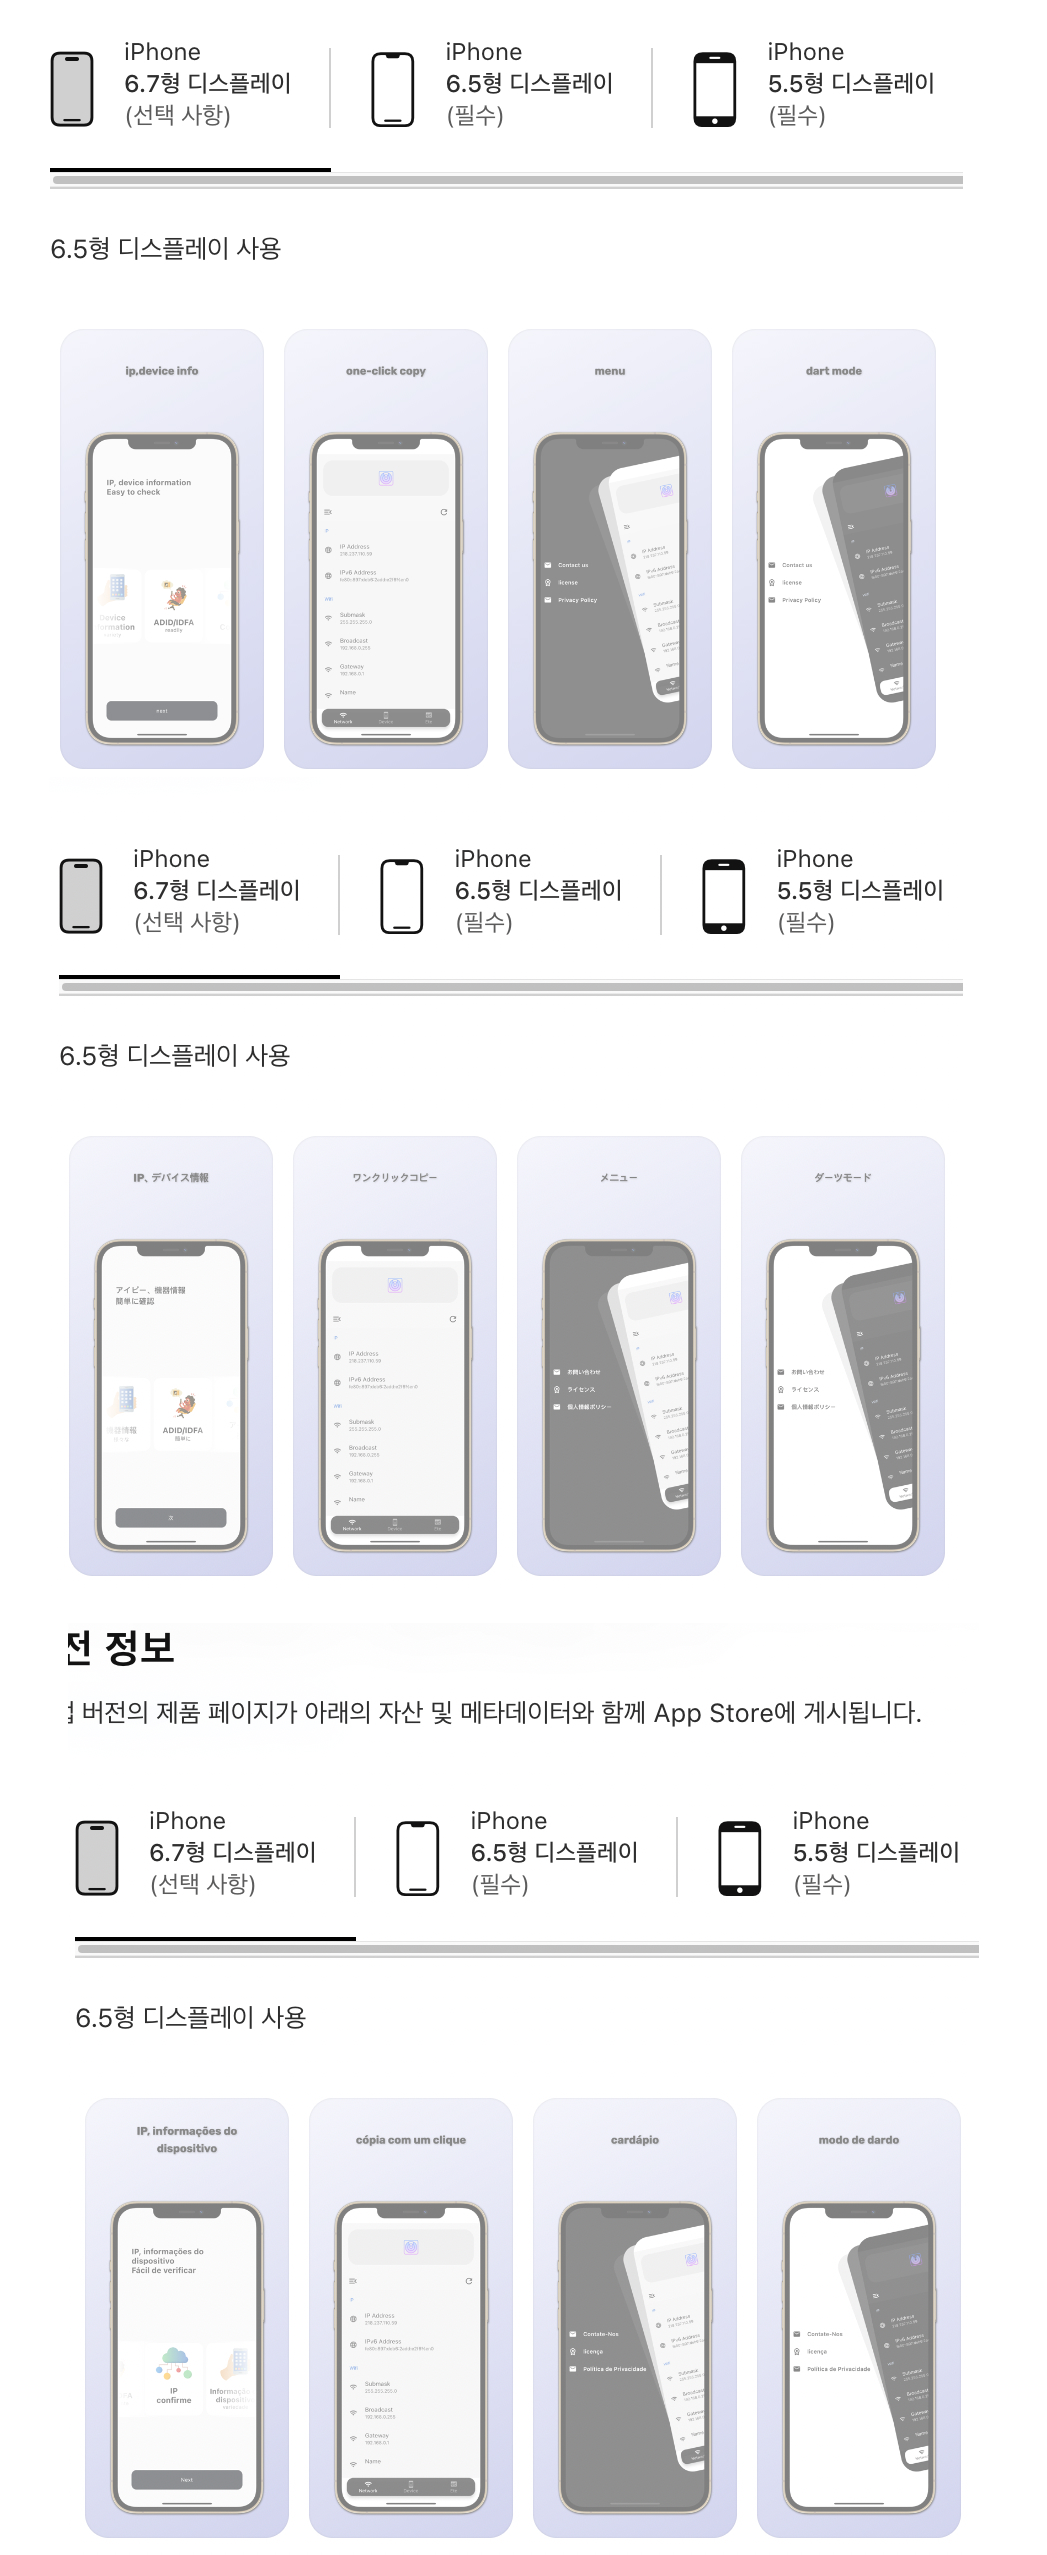
10. You can see that the store image is generated in the “auto_translation/framed” directory as follows.

11. Move the generated file to the file structure that fastlane can understand.
- create dart file name is “framed_distribute.dart” in the “auto_translate” directory and write the following code.
import 'package:auto_screenshot_translate/auto_screenshot_translate.dart';

Future<void> main() async {
  AutoScreenshotTranslate.distributeScreenshotFrameFile();
}
- run this file in the terminal.
dart auto_translation/framed_distribute.dart
- You can see the files that are made of structures that fastlane can understand.
12. deploy to play store and app store.
– play store
1. Setup the fastlane config file(android)
please refer to the official document and auto_store_translate library.
2. Add the code below under platform:android do in the android/fastlane/fastfile file.
    lane :metaWithScreenshot do
      upload_to_play_store(
          track: 'internal',
          metadata_path: '../auto_translation/metadata/android',
          skip_upload_changelogs: true,
          release_status: 'draft',
          aab: '../build/app/outputs/bundle/release/app-release.aab',
      )
    end
3. Open the terminal in the android project location and enter the following.
fastlane metaWithScreenshot
4. You will see the translated information in the play store console.

– app store
1. Setup the fastlane config file(ios)
please refer to the official document.
2. Add the code below under platform:ios do in the ios/fastlane/fastfile file.
   lane :onlyScreenShotOverWrite do
      get_certificates           # invokes cert
      get_provisioning_profile   # invokes sigh
      deliver(
          skip_metadata: true,
          screenshots_path: '../metadata/[프로젝트명]/ios/screenshots',
          overwrite_screenshots: true,
          force: true, # Skip HTMl report verification
          # skip_screenshots: true,
          skip_binary_upload: true,
      )
   end
3. Open the terminal in the ios project location and enter the following.
fastlane onlyScreenShotOverWrite
4. You will see the translated information in the app store connect.

