GraphX™
GraphX lib for Flutter.
WARNING: this lib is on alpha stage, the api can change.
NOTE: GraphX™ uses the $ prefix convention for all internal and private members (properties and methods). DO NOT call them in your code... is meant to be consumed internally by the lib, it will remain as it is, at least initially, while the package takes shape.
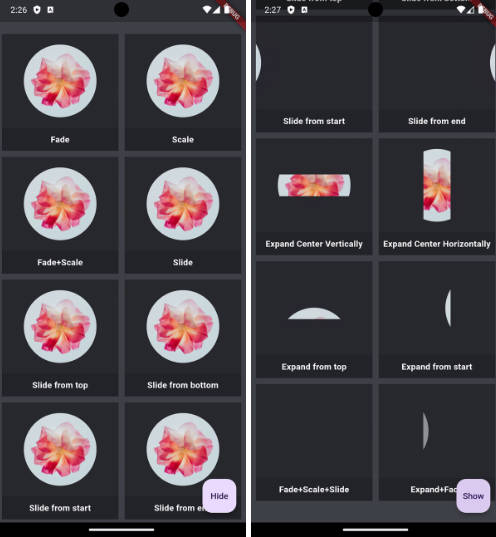
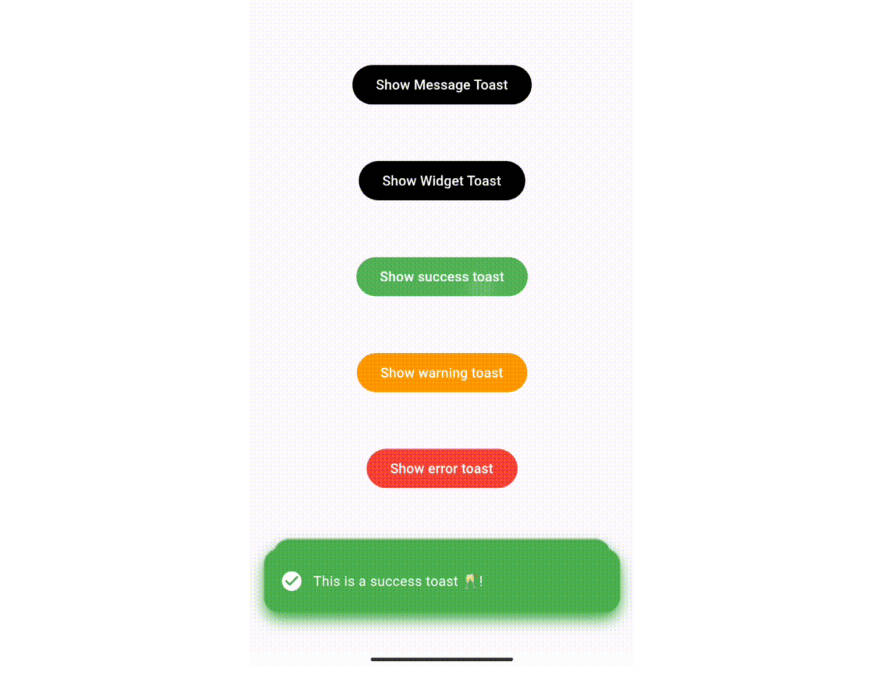
As graphx is about visuals, here you have some screen captures of random prototypes I've been doing, while developing and testing graphx.
Background.
GraphX™ is here to help you build custom drawings in your Flutter apps. Providing a great versatility to power those screen pixels to a different level.
It's inspired by the good-old Flash API, which forged my way into programming back in the days, and inspired many other rendering frameworks, in several languages through the years.
I was thinking how much I missed to "play" with code, to make things more organic, artistic, alive... I totally love Flutter, but I always feel that it requires too much boilerplate to make things move around (compared to what I used to code).
Even if GraphX™ is not an animation library (although has a small tween engine), nor a game engine, It can help you build really awesome user experiences! It just runs on top of CustomPainter... Using what Flutter SDK exposes from the SKIA engine through the Canvas, yet, gives you some "framework" to run isolated from the Widget's world.
Can be used to simple draw a line, a circle, maybe a custom button, some splash effect on your UI, or even a full-blown game in a portion of the screen.
Mix and match with Flutter as you please, as GraphX™ uses CustomPainter, it is part of your Widget's tree.
Concept.
This repo is a very early WIP ... the library still lacks of support for loading remote assets, 2.5 transformation and some other niceties.
Yet, it has a ver basic support for loading rootBundle assets:
AssetLoader.loadBinary(assetId)
AssetLoader.loadGif(assetId)
AssetLoader.loadTextureAtlas(imagePath, xmlPath)
AssetLoader.loadTexture(assetId)
AssetLoader.loadImage(assetId)
AssetLoader.loadString(assetId)
AssetLoader.loadJson(assetId)
GraphX™ also provides basic "raw" support for Text rendering, using the StaticText class.
How does it work?
GraphX™ drives a CustomPainter inside. The idea is to simplify the usage of Flutter's Canvas, plus adding the display list concept, very similar to the Widget Tree concept; so you can imperatively code, manage and create more complex "Scenes".
The library has its own rendering cycle using Flutter's Ticker (pretty much like AnimationController does), and each SceneWidgetBuilder does its own input capture and processing (mouse, keyboard, touches). Even if it runs on the Widget tree, you can enable the flags to capture mouse/touch input, or keystrokes events (if u wanna do some simple game, or desktop/web tool).
Sample code.
  body: Center(
    child: SceneBuilderWidget( /// wrap any Widget with SceneBuilderWidget
      builder: () => SceneController.withLayers(
        back: GameSceneBack(), /// optional provide the background layer
        front: GameSceneFront(), /// optional provide the foreground layer
      ),
      child: Column(
        mainAxisAlignment: MainAxisAlignment.center,
        children: <Widget>[
          Text(
            'You have pushed the button this many times:',
          ),
          Text(
            '$_counter',
            style: Theme.of(context).textTheme.headline4,
          ),
        ],
      ),
    ),
  ),
GraphX™ is based on "Scenes" layers, each SceneBuilderWidget requires a SceneController.
This controller is the "initializer" of the Scenes layers, which can be:
back(background painter),front(foreground painter),- or both.
Each "Scene Layer" has to extend SceneRoot, which represents the starting point of that particular scene hierarchy. Think of it as MaterialApp widget is to all other children Widgets in the tree.
Here we get into GraphX™ world, no more Widgets Trees or immutable properties.
You can override init() to setup things needed for this current Scene Painter object, like if it needs keyboard/mouse/touch access, or if it requires a Ticker and redraw the CustomPainter, cause it will animate.
Override ready() as your entry point, here the engine is set up, and the glorified Stage is available to use.
class GameScene extends SceneRoot {
  GameScene(){
    config(autoUpdateAndRender: true, usePointer: true);
  }

  @override
  void addedToStage() {
    /// if you have to stop the Ticker. Will stop all
    /// Tweens, Jugglers objects in GraphX.
    stage.scene.core.ticker.pause();
  }
For now, GraphX™ has a couple of classes for rendering the display list:
Shape and Sprite ( which are DisplayObject, DisplayObjectContainer are abstracts),
They both have a graphics property which is of type Graphics and provides a simplistic API to paint on the Flutter's Canvas.
By the way, SceneRoot is a Sprite as well!, and it's your root node in the display tree, kinda where all starts to render, and where you need to add your own objects.
For instance, to create a simple purple circle:
@override
void addedToStage(){
    var circle = Shape();
    circle.graphics.lineStyle(2, Colors.purple.value) /// access hex value of Color
      ..drawCircle(0, 0, 20)
      ..endFill();
    addChild(circle); // add the child to the rootScene.
}
SceneRoot is a Sprite (which is a DisplayObjectContainer) and can have children inside, yet Shape is a DisplayObject, and can't have children. But it makes it a little bit more performant on each painter step.
We could also use our root scene to draw things:
@override
addedToStage(){
  graphics.beginFill(0x0000ff, .6)
  ..drawRoundRect(100, 100, 40, 40, 4)
  ..endFill();
...
}
Scene setup sample in your SceneRoot (in your constructor):
config(
  autoUpdateAndRender: true,
  usePointer: true,
  useTicker: true,
  useKeyboard: false,
  sceneIsComplex: true,
);
Pointer signals has been "simplified" as Mouse events now... as it's super easy to work with single touch / mouse interactions in DisplayObjects.
There're a bunch of signals to listen on each element... taken from AS3, and JS.
- onMouseDoubleClick
- onMouseClick
- onMouseDown
- onMouseUp
- onMouseMove
- onMouseOver
- onMouseOut
- onMouseScroll
They all emit a MouseInputData with all the needed info inside, like stage coordinates, or translated local coordinates, which "mouse" button is pressed, etc.
I will keep adding further explanation in the upcoming days.
Demos.
Some demos are only using GraphX™ partially, and might have big CPU impact
First Experimentation with rendering
Screencast Demos