flutter_floatwing

A Flutter plugin that makes it easier to make floating/overlay windows for Android with pure Flutter. Android only
Features
- Pure Flutter: you can write your whole overlay windows in pure Flutter.
- Simple: at least only 1 line of code to start your overlay window.
- Auto Resize: just care about your Flutter widget size, it will auto resize for Android view.
- Multi-window: support create multiple overlay windows in one App, and window can has child windows.
- Communicable: your main App can talk with windows, and also supported between windows.
- Event Mechanism: fire the events of window lifecyle and other actions like drag, you can controll your window more flexible.
- and more features are coming …
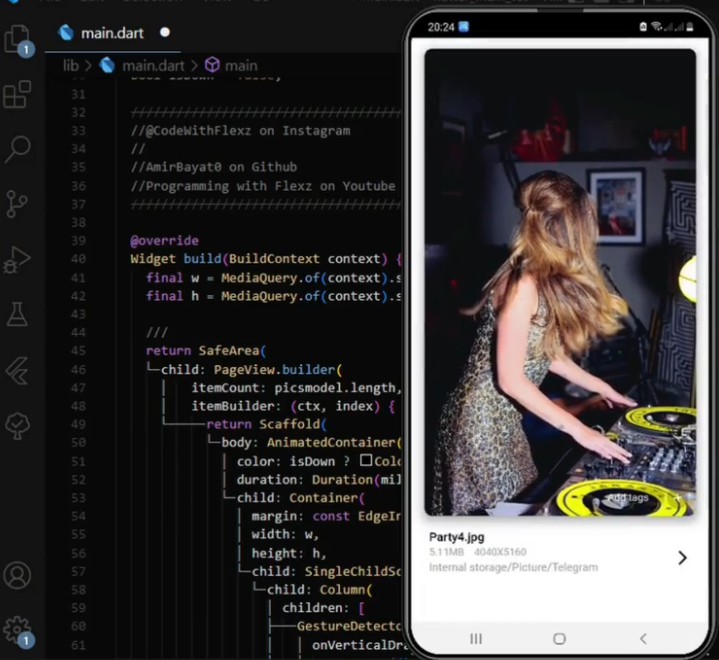
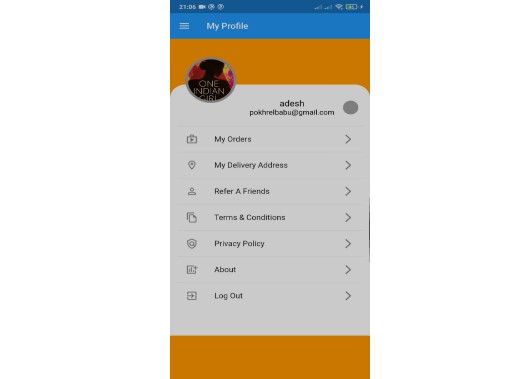
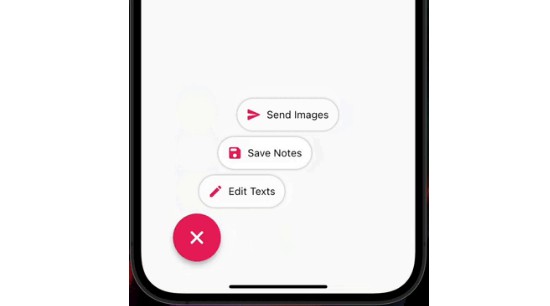
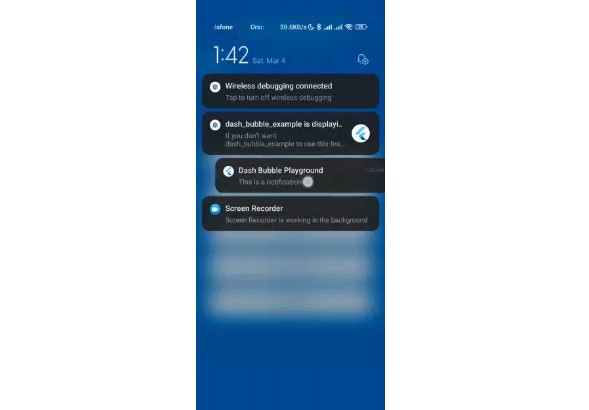
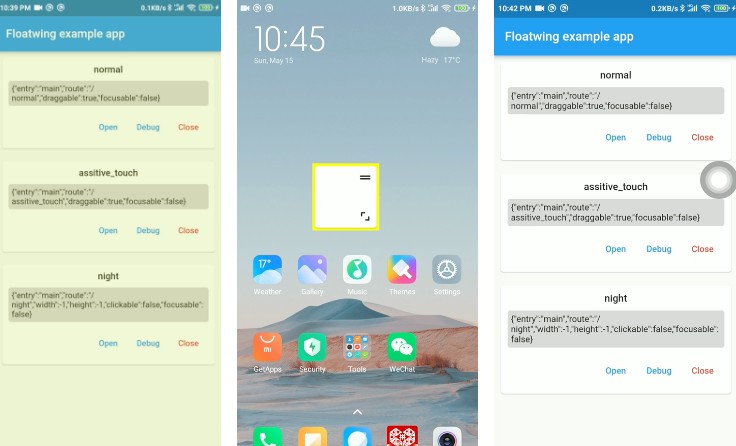
Previews
| Night mode | Simpe example | Assistive touch mock |
|---|---|---|
 |
 |
 |
Installtion
Open the pubspec.yaml file located inside the app folder, and add flutter_floatwing under dependencies.
dependencies:
  flutter_floatwing: <latest_version>
The latest version is
Then you should install it,
- From the terminal: Run
flutter pub get. - From Android Studio/IntelliJ: Click Packages get in the action ribbon at the top of
pubspec.yaml. - From VS Code: Click Get Packages located in right side of the action ribbon at the top of
pubspec.yaml.
Or simply add it in your command line:
flutter pub add flutter_floatwing
Quick Started
We use the android’s system alert window to display, so need to add the permission in AndroidManifest.xml first:
<uses-permission android:name="android.permission.SYSTEM_ALERT_WINDOW" />
Add a route for your widget which will be displayed in the overlay window:
  @override
  Widget build(BuildContext context) {
    return MaterialApp(
      debugShowCheckedModeBanner: false,
      initialRoute: "/",
      routes: {
          "/": (_) => HomePage(),
          // add a route as entrypoint for your overlay window.
          "/my-overlay-window": (_) => MyOverlayWindow(),
      },
    );
  }
Before we start the floating window,
we need to check and request the permission, and initialize the flutter_floatwing plugin in initState or any button’s callback function:
// check and grant the system alert window permission.
FloatwingPlugin().checkPermission().then((v) {
    if (!v) FloatwingPlugin().openPermissionSetting();
});

// initialize the plugin at first.
FloatwingPlugin().initialize();
Next to start create and start your overlay window:
// define window config and start the window from config.
WindowConfig(route: "/my-overlay-window")
    .to() // create a window object
    .create(start: true); // create the window and start the overlay window.
for more information.
Architecture
Before we see how flutter_floatwing manage windows in detail,
we need to know some things about the design of the plugin.
idis the unique identifier for the window, and all operations on the window are based on thisid, you must provide one before creating.- We consider the first engine created by opening the main application as the
main engineorplugin engine. The other engines created by service arewindow engine. - Different
engineare differentthreadsand cannot communicate directly. - Subscribe events of all windows from
main engineis allowed, it’s also allowed to subscribe events of own and child windows inwindow engine. But we can not subscribe events of sibling or parent windows. sharedata is the only way to communicate betweenwindow engineorplugin engine, there are no restrictions on it, except that the data needs to be serializable. Which means you can share data from anywhere to anywhere.
A floatwing window object contains: a flutter engine which run a widget by runApp and a view which add to window manager.

The whole view hierarchy like below:

Usage
Before we start how to use flutter_floatwing in detail,
let’s talk about how the flutter_floatwing create a new overlay window:
- First of all we need to start a service as manager by main app.
- Then create window request send to the service.
- In the service, we start the flutter engine with entrypoint.
- Create a new flutter view and attach it to the flutter engine.
- Add the view to android window manager.
Window & Config
WindowConfig contains all configuration for window.
We can use configuration to create a window like below:
void _createWindow() {
    var config = WindowConfig();
    w = Window(config, id="my-window");
    w.create();
}
If you have no need to register event or data handler, you can just use config to create a window.
void _createWindow() {
    WindowConfig(id="my-window").create();
}
But as you can see, if you want to provide a id for window,
must provide in WindowConfig.
If want to register handler, you can use a to() function to turn a config to a window at first,
this is every useful when you want to make code simple.
void _createWindow() {
    WindowConfig(id="my-window").to()
        .on(EventType.WindowCreated, (w, _) {})
        .create();
}
Lifecyle of Window
- created
- started
- paused
- resumed
- destroy
TODO
Entrypoint
Entrypoint is where the engine execute from. We support 3 modes of configuration:
| Name | Config | How to use |
|---|---|---|
route |
WindowConfig(route: "/my-overlay") |
– Add a route for overlay window in your main routes– Start window with config: WindowConfig(route: "/my-overlay") |
staic function |
WindowConfig(callback: myOverlayMain) |
– Define a static function void Function() which calling runApp to start a widget.– Start window with config: WindowConfig(callback: myOverlayMain) |
entry-point |
WindowConfig(entry: "myOverlayMain") |
– First step is same as staic function.– Add @pragma("vm:entry-point") above the static function.– Start window with config: WindowConfig(entry: "myOverlayMain")– like static function, but use string of function name as parameter |
Example for route
- Add route for your overlay widget in the main application.
  @override
  Widget build(BuildContext context) {
    return MaterialApp(
      debugShowCheckedModeBanner: false,
      initialRoute: "/",
      routes: {
          "/": (_) => HomePage(),
          // add a route as entrypoint for your overlay window.
          "/my-overlay-window": (_) => MyOverlayWindow(),
      },
    );
  }
- Start window with
routeas config.
    void _startWindow() {
        // define window config and start the window from config.
        WindowConfig(route: "/my-overlay-window")
            .to() // create a window object
            .create(start: true); // create the window and start the overlay window.
    }
Example for static function
- Define a static function which called
runApp
void myOverlayMain() {
    runApp(MaterialApp(
        home: AssistivePannel(),
    ));
    // or simply use `floatwing` method to inject `MaterialApp`
    // runApp(AssistivePannel().floatwing(app: true));
}
- Start window with
callbackas config.
    void _startWindow() {
        // define window config and start the window from config.
        WindowConfig(callback: myOverlayMain)
            .to() // create a window object
            .create(start: true); // create the window and start the overlay window.
    }
Example for entry-point
- Define as static function which called
runAppand addprama
@pragma("vm:entry-point")
void myOverlayMain() {
    runApp(MaterialApp(
        home: AssistivePannel(),
    ));
    // or simply use `floatwing` method to inject `MaterialApp`
    // runApp(AssistivePannel().floatwing(app: true));
}
- Start window with
entryas config.
    void _startWindow() {
        // define window config and start the window from config.
        WindowConfig(entry: "myOverlayMain")
            .to() // create a window object
            .create(start: true); // create the window and start the overlay window.
    }
Wrap your widget
For simple widget, you have no need to do with your widget. But if you want more functions and make your code clean, we provide a injector for your widget.
For now there are some functions listed below,
- Auto resize the window view.
- Auto sync and ensure the window.
- Wrap a
MaterialApp - more features are coming
Before, we write our overlay main function, like below,
void overlayMain() {
  runApp(MaterialApp(
    home: MyOverView(),
  ))
}
Now, we can code simply,
void overlayMain() {
  runApp(MyOverView().floatwing(app: true)))
}
We can wrap to a Widget and a WidgetBuilder,
wrap the WidgetBuilder, we can access the window instance
with Window.of(context), while FloatwingPlugin().currentWindow
is the only to get window instance for wrap Widget.
If we want to access the window with Window.of(context),
change the code like below,
void overlayMain() {
  runApp(((_)=>MyOverView()).floatwing(app: true).make()))
}
Access window in overlay window
In your window engine, you can access the window object in 2 ways:
- Directly access the cache field of plugin:
FloatwingPlugin().currentWindow. - If widget injected by
.floatwing(), you can take window withWindow.of(context).
FloatwingPlugin().currentWindow will return null unless initialize has been completed.
If you inject WidgetBuilder with .floatwing(),
then you can access the current window.
It will always return non-value, unless you enable debug with .floatwing(debug: true).
For example, if we want to get the id of current window,
we can do it like below:
/// ...
import 'package:flutter_floatwing/flutter_floatwing.dart';

class _ExampleViewState extends State<ExampleView> {
    Window? w;

    @override
    void initState() {
        super.initState();
        SchedulerBinding.instance?.addPostFrameCallback((_) {
            w = Window.of(context);
            print("my window id is ${w.id}");
        });
    }
}
Subscribe events
We can subscribe events from windows, and trigger actions when events fired.
Events of window will be sent to main engine, self window engine and the parent `window engine.
Which means you can subscribe events of window from flutter of main application,
overlay window and parent overlay window.
Currently we support events for window lifecycle and drag action.
enum EventType {
  WindowCreated,
  WindowStarted,
  WindowPaused,
  WindowResumed,
  WindowDestroy,

  WindowDragStart,
  WindowDragging,
  WindowDragEnd,
}
More events type are coming, and contributtions are welcome!
For example, we want to do something when the window is started, we can code like below:
  @override
  void initState() {
    super.initState();

    SchedulerBinding.instance?.addPostFrameCallback((_) {
      w = Window.of(context);
      w?.on(EventType.WindowStarted, (window, _) {
          print("$w has been started.");
      }).on(EventType.WindowDestroy, (window, data) {
          // data is a boolean value, which means that the window
          // are destroyed force or not.
          print("$w has been destroy, force $data");
      });
    });
  }
Share data with windows
Sharing data is the only way to communicate with windows.
We provide a simple way to do this: window.share(data).
For example, if you want to share data to overlay window from main application.
First get the target window in main application,
usually the created one can be used or you can get one from windows cache by id,
    Window w;

    void _startWindow() {
        w = WindowConfig(route: "/my-overlay-window").to();
    }

    void _shareData(dynamic data) {
        w.share(data).then((value) {
            // and window can return value.
        });
        // or just take one from cache
        // FloatwingPlugin().windows["default"]?.share(data);
    }
If you want to share data with a name, yon can add the name parameter: “w.share(data, name=”name-1″)`.
And then you should listen the data in window by register the data handler.
  @override
  void initState() {
    super.initState();

    SchedulerBinding.instance?.addPostFrameCallback((_) {
      w = Window.of(context);
      w?.onData((source, name, data) async {
          print("get $name data from $source: $data");
      });
    });
  }
The function signature of handler is Future<dynamic> Function(String? source, String? name, dynamic data).
sourceis where the data comes from,nullif from main application, from window will be theidof window.nameis the data name, you can share data for different purposes.datais the data that you get.- return some value if you want to do.
There are restrictions for directions of communication, unless you send data to self, which will not be allowed. Which means you can send data as long as you know the id of window. Currently share to main application is not implemented.
Note: The data you are sharing should be serializable.
API References
FloatwingPlugin instance
FloatwingPlugin is a singleton class that returns the same instance every time it called FloatwingPlugin() factory method.
WindowConfig Object
TODO
Window Object
TODO
Events
Window lifecycle
Action
More events type are coming, and comtributions are welcome!
Support
Did you find this plugin useful? Please consider to make a donation to help improve it!
Contributing
Contributions are always welcome!