relateddigital-flutter
This library is the official Flutter SDK of Related Digital.
Requirements
- iOS 10.0 or later
- Android API level 21 or later
Installation
- Edit your project's
pubspec.yamlfile:
dependencies:
    relateddigital_flutter: ^0.2.1
-
Run
flutter pub get -
Import the package:
import 'package:relateddigital_flutter/relateddigital_flutter.dart';
Platform-Integration
Android
- Add the following lines to the
repositoriessection inproject/build.gradle
maven {url 'http://developer.huawei.com/repo/'} // skip if your app does not support HMS
- Add the following lines to the
dependenciessection inproject/build.gradle
classpath 'com.google.gms:google-services:4.3.5'
classpath 'com.huawei.agconnect:agcp:1.4.1.300' // skip if your app does not support HMS
- Add the following lines to the end of
app/build.gradle
apply plugin: 'com.google.gms.google-services'
apply plugin: 'com.huawei.agconnect' // skip if your app does not support HMS
-
Change your minSdkVersion to 21.
-
Add the following services to your
AndroidManifest.xml, within the<application></application>tags.
<service
   android:name="euromsg.com.euromobileandroid.service.EuroFirebaseMessagingService"
   android:exported="false">
   <intent-filter>
       <action android:name="com.google.firebase.MESSAGING_EVENT" />
   </intent-filter>
</service>
<!-- skip if your app does not support HMS  -->
<service
   android:name="euromsg.com.euromobileandroid.service.EuroHuaweiMessagingService"
   android:exported="false">
   <intent-filter>
       <action android:name="com.huawei.push.action.MESSAGING_EVENT" />
   </intent-filter>
</service>
- Add below meta-data parameters in your AndroidManifest.xml
<meta-data android:name="VisilabsOrganizationID" android:value="VisilabsOrganizationID" />
<meta-data android:name="VisilabsSiteID" android:value="VisilabsSiteID" />
<meta-data android:name="VisilabsSegmentURL" android:value="http://lgr.visilabs.net" />
<meta-data android:name="VisilabsDataSource" android:value="VisilabsDataSource" />
<meta-data android:name="VisilabsRealTimeURL" android:value="http://rt.visilabs.net" />
<meta-data android:name="VisilabsChannel" android:value="Android" />
<meta-data android:name="VisilabsGeofenceURL" android:value="http://s.visilabs.net/geojson" />
<meta-data android:name="VisilabsGeofenceEnabled" android:value="true" />

<!-- Parameters below are optional -->

<meta-data android:name="VisilabsRequestTimeoutInSeconds" android:value="30" />
<meta-data android:name="VisilabsRESTURL" android:value="VisilabsRESTURL" />
<meta-data android:name="VisilabsEncryptedDataSource" android:value="VisilabsEncryptedDataSource" />
<meta-data android:name="VisilabsTargetURL" android:value="http://s.visilabs.net/json" />
<meta-data android:name="VisilabsActionURL" android:value="http://s.visilabs.net/actjson" />
-
Add
google-services.jsonfile to your application’sappdirectory. -
If your app supports
HMSaddagconnect-services.jsonfile to your application’sappdirectory.
iOS
- Change the ios platform version to 10.0 or higher in
Podfile
platform :ios, '10.0'
-
In your project directory, open the file
ios/Runner.xcworkspacewith Xcode. -
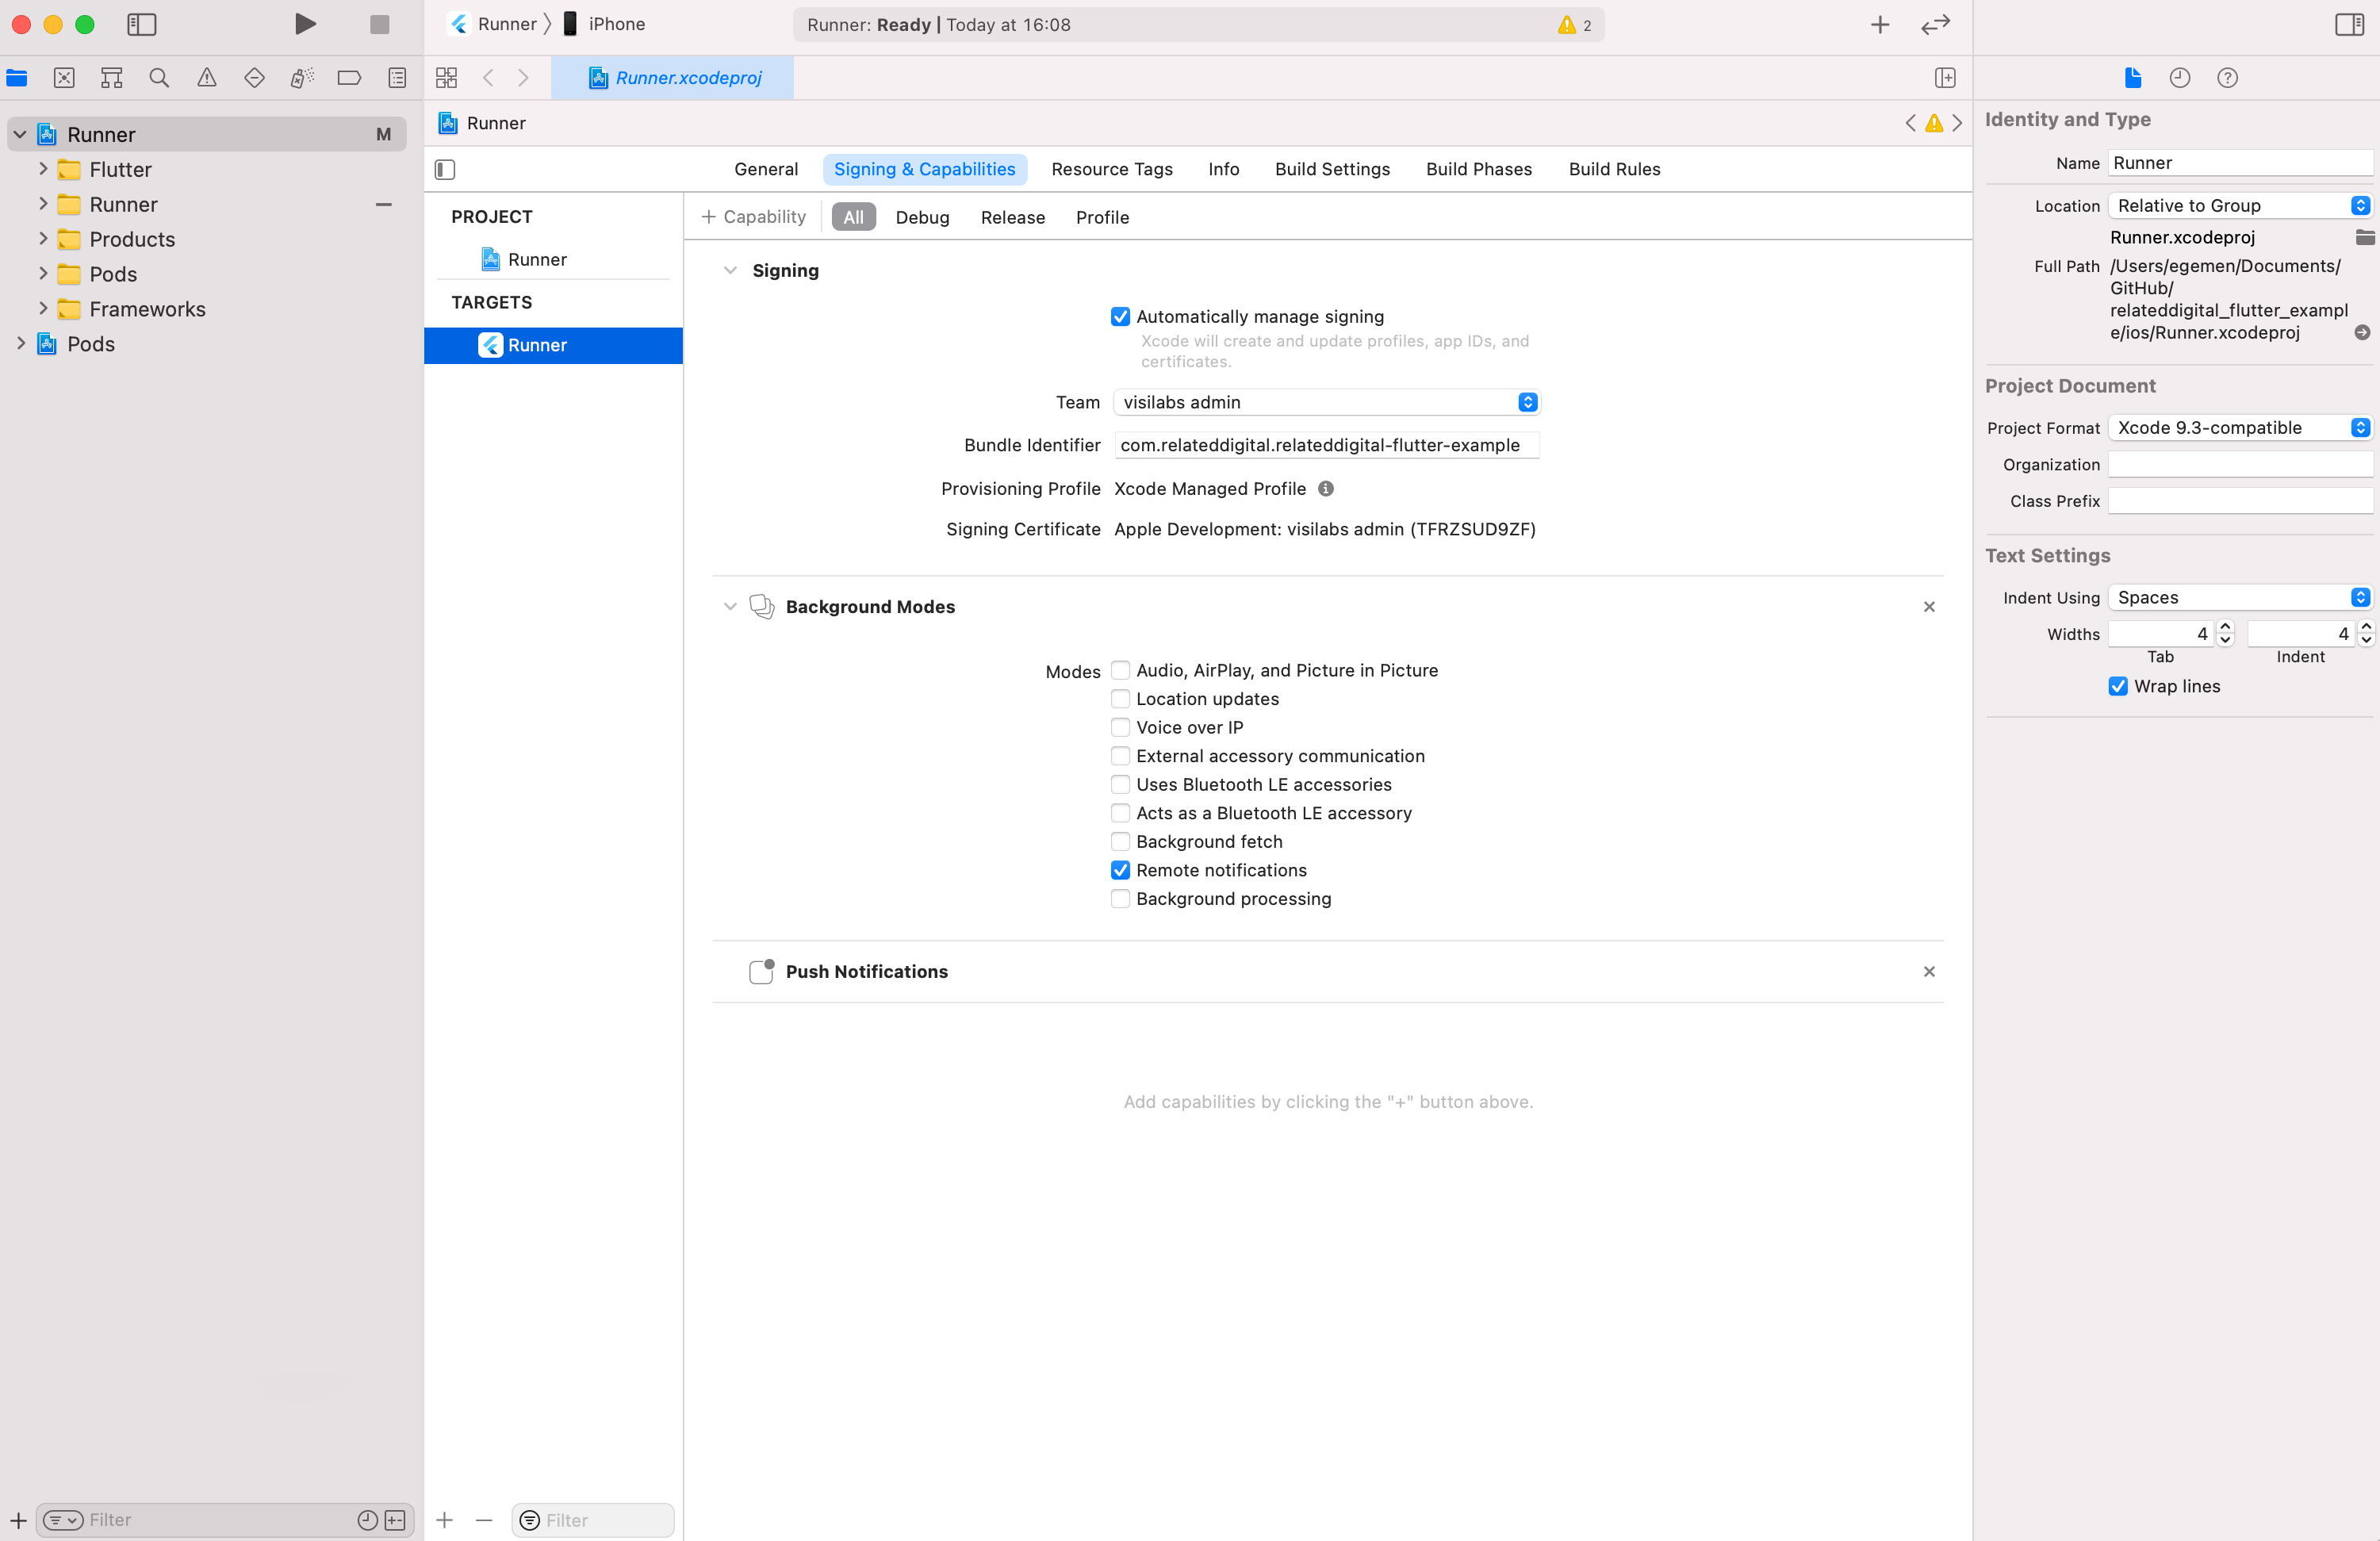
Enable
Push NotificationsandBackground Modes->Remote Notificationscapabilities.
- If you want to use AdvertisingTrackingID with isIDFAEnabled parameter (see Usage below), you need to add this key to your Info.plist file for iOS 14 and above.
<key>NSUserTrackingUsageDescription</key>
<string>We use advertising identifier!</string>
Usage
Initializing
Import the library
import 'package:relateddigital_flutter/relateddigital_flutter.dart';
import 'package:relateddigital_flutter/request_models.dart';
import 'package:relateddigital_flutter/response_models.dart';
Initialize the library
final RelateddigitalFlutter relatedDigitalPlugin = RelateddigitalFlutter();

@override
void initState() {
  super.initState();
  initLib();
}

Future<void> initLib() async {
  var initRequest = RDInitRequestModel(
    appAlias: Platform.isIOS ? 'ios-alias' : 'android-alias',
    huaweiAppAlias: 'huawei-alias', // pass empty String if your app does not support HMS
    androidPushIntent: 'com.test.MainActivity', // Android only
    organizationId: 'ORG_ID',
    siteId: 'SITE_ID',
    dataSource: 'DATA_SOURCE',
    maxGeofenceCount: 20,  // iOS only
    geofenceEnabled: true,
    inAppNotificationsEnabled: true,
    logEnabled: true,
    isIDFAEnabled: true,  // iOS only
  );

  await relatedDigitalPlugin.init(initRequest, _readNotificationCallback);
}

void _readNotificationCallback(dynamic result) {
  print(result);
}
Push Notifications
Requesting Permission & Retrieving Token
Add the lines below to request push notification permission and retrieve token.
IOS
- Instead of having to prompt the user for permission to send them push notifications, your app can request provisional authorization. In order to enable provisional authorization, you should set
isProvisionalparameter ofrequestPermissionmethod totrue.
String token = '-';

void _getTokenCallback(RDTokenResponseModel result) {
  if(result != null && result.deviceToken != null && result.deviceToken.isNotEmpty) {
    setState(() {
      token = result.deviceToken;
    });
  }
  else {
    setState(() {
      token = 'Token not retrieved';
    });
  }
}

Future<void> requestPermission() async {
  await relatedDigitalPlugin.requestPermission(_getTokenCallback, isProvisional: true);
}
Rich Push Notifications
To be able to receive rich notifications with images, buttons and badges, follow the steps below.
IOS
- In Xcode, add a new Notification Service Extension target and name it NotificationService.
- In your podfile, add below section and then run
pod install.
target 'NotificationService' do
	use_frameworks!
	pod 'Euromsg'
end

post_install do |installer|
  installer.pods_project.targets.each do |target|
    flutter_additional_ios_build_settings(target)
    target.build_configurations.each do |config|
		config.build_settings['APPLICATION_EXTENSION_API_ONLY'] = 'No'
	end
  end
end
- Set NotificationService target's deployment target to iOS 11.
- Replace NotificationService.swift file content with the code below.
import UserNotifications
import Euromsg

class NotificationService: UNNotificationServiceExtension {

		var contentHandler: ((UNNotificationContent) -> Void)?
		var bestAttemptContent: UNMutableNotificationContent?

		override func didReceive(_ request: UNNotificationRequest, withContentHandler contentHandler: @escaping (UNNotificationContent) -> Void) {
				self.contentHandler = contentHandler
				bestAttemptContent = (request.content.mutableCopy() as? UNMutableNotificationContent)
				Euromsg.didReceive(bestAttemptContent, withContentHandler: contentHandler)
		}

		override func serviceExtensionTimeWillExpire() {
				// Called just before the extension will be terminated by the system.
				// Use this as an opportunity to deliver your "best attempt" at modified content, otherwise the original push payload will be used.
				if let contentHandler = contentHandler, let bestAttemptContent =  bestAttemptContent {
						Euromsg.didReceive(bestAttemptContent, withContentHandler: contentHandler)
				}
		}

}
Carousel Push Notifications
To be able to receive push notifications with carousel, follow the steps below.
IOS
- In Xcode, add a new Notification Content Extension target and name it NotificationContent.
- In your podfile, add below section and then run
pod install.
target 'NotificationContent' do
	use_frameworks!
	pod 'Euromsg'
end
- Set NotificationContent target's deployment target to iOS 11.
- Delete MainInterface.storyboard and NotificationContent.swift files. Then create a swift file named EMNotificationViewController.swift under the NotificationContent folder.
- Replace EMNotificationViewController.swift file content with the code below.
import UIKit
import UserNotifications
import UserNotificationsUI
import Euromsg

@available(iOS 10.0, *)
@objc(EMNotificationViewController)
class EMNotificationViewController: UIViewController, UNNotificationContentExtension {

		let appUrl = URL(string: "euromsgExample://")
		let carouselView = EMNotificationCarousel.initView()
		var completion: ((_ url: URL?, _ userInfo: [AnyHashable: Any]?) -> Void)?
		func didReceive(_ notification: UNNotification) {
				carouselView.didReceive(notification)
		}
		func didReceive(_ response: UNNotificationResponse,
										completionHandler completion: @escaping (UNNotificationContentExtensionResponseOption) -> Void) {
				carouselView.didReceive(response, completionHandler: completion)
		}
		override func loadView() {
				completion = { [weak self] url, userInfo in
						if let url = url {
								self?.extensionContext?.open(url)
								if url.scheme != self?.appUrl?.scheme, let userInfo = userInfo {
										Euromsg.handlePush(pushDictionary: userInfo)
								}
						}
						else if let url = self?.appUrl {
								self?.extensionContext?.open(url)
						}
				}
				carouselView.completion = completion
				//Add if you want to track which element has been selected
				carouselView.delegate = self
				self.view = carouselView
		}
}

/**
 Add if you want to track which carousel element has been selected
 */
extension EMNotificationViewController: CarouselDelegate {

		func selectedItem(_ element: EMMessage.Element) {
				//Add your work...
				print("Selected element is => \(element)")
		}

}
- In your NotificationContent/Info.plist add below section
<key>NSExtension</key>
<dict>
    <key>NSExtensionAttributes</key>
    <dict>
        <key>UNNotificationExtensionCategory</key>
        <string>carousel</string>
        <key>UNNotificationExtensionDefaultContentHidden</key>
        <false />
        <key>UNNotificationExtensionInitialContentSizeRatio</key>
        <real>1</real>
        <key>UNNotificationExtensionUserInteractionEnabled</key>
        <true />
    </dict>
    <key>NSExtensionPointIdentifier</key>
    <string>com.apple.usernotifications.content-extension</string>
    <key>NSExtensionPrincipalClass</key>
    <string>NotificationContent.EMNotificationViewController</string>
</dict>
Set Push Permit
You can only call setNotificationPermission method to enable or disable push notifications for the application.
relatedDigitalPlugin.setNotificationPermission(true);
Data Collection
Related Digital uses events to collect data from mobile applications. The developer needs to implement the methods provided by SDK. customEvent is a generic method to track user events. customEvent takes 2 parameters: pageName and properties.
- pageName : The current page of your application. If your event is not related to a page view, you should pass a value related to the event. If you pass an empty String the event would be considered invalid and discarded.
- parameters : A collection of key/value pairs related to the event. If your event does not have additional data apart from page name, passing an empty Map acceptable.
Some of the most common events:
Sign Up
String userId = 'userId';
// optional
Map<String, String> properties = {
  'OM.b_sgnp':'1'
};

await relatedDigitalPlugin.signUp(userId, properties: properties);
Login
String userId = 'userId';
// optional
Map<String, String> properties = {
  'OM.b_login':'1'
};

await relatedDigitalPlugin.login(userId, properties: properties);
Page View
Use the following implementation of customEvent method to record the page name the visitor is currently viewing. You may add extra parameters to properties Map or you may leave it empty.
String pageName = 'Page Name';
Map<String, String> parameters = {};
await relatedDigitalPlugin.customEvent(pageName, parameters);
Product View
Use the following implementation of customEvent when the user displays a product in the mobile app.
String pageName = 'Product View';
Map<String, String> parameters = {
  'OM.pv' : productCode,
  'OM.pn' : productName,
  'OM.ppr' : productPrice,
  'OM.pv.1' : productBrand,
  'OM.inv': inventory // Number of items in stock
};
relatedDigitalPlugin.customEvent(pageName, parameters);
Add to Cart
Use the following implementation of customEvent when the user adds items to the cart or removes.
String pageName = 'Cart';
Map<String, String> parameters = {
  'OM.pbid' : basketID,
  'OM.pb' : 'Product1 Code;Product2 Code',
  'OM.pu' : 'Product1 Quantity;Product2 Quantity',
  'OM.ppr' : 'Product1 Price*Product1 Quantity;Product2 Price*Product2 Quantity'
};
relatedDigitalPlugin.customEvent(pageName, parameters);
Product Purchase
Use the following implementation of customEvent when the user buys one or more items.
String pageName = 'Purchase';
Map<String, String> parameters = {
  'OM.tid' : transactionID,
  'OM.pp' : 'Product1 Code;Product2 Code',
  'OM.pu' : 'Product1 Quantity;Product2 Quantity',
  'OM.ppr' : 'Product1 Price*Product1 Quantity;Product2 Price*Product2 Quantity',
  'OM.exVisitorID' : userId
};
relatedDigitalPlugin.customEvent(pageName, parameters);
Product Category Page View
When the user views a category list page, use the following implementation of customEvent.
String pageName = 'Category View';
Map<String, String> parameters = {
  'OM.clist': '12345',
};
relatedDigitalPlugin.customEvent(pageName, parameters);
In App Search
If the mobile app has a search functionality available, use the following implementation of customEvent.
String pageName = 'In App Search';
Map<String, String> parameters = {
  'OM.OSS': searchKeyword,
  'OM.OSSR': searchResult.length,
};
relatedDigitalPlugin.customEvent(pageName, parameters);
Banner Click
You can monitor banner click data using the following implementation of customEvent.
String pageName = 'Banner Click';
Map<String, String> parameters = {
  'OM.OSB': 'Banner Name/Banner Code',
};
relatedDigitalPlugin.customEvent(pageName, parameters);;
Add To Favorites
When the user adds a product to their favorites, use the following implementation of customEvent.
String pageName = 'Add To Favorites';
Map<String, String> parameters = {
  'OM.pf' : productCode,
  'OM.pfu' : '1',
};
relatedDigitalPlugin.customEvent(pageName, parameters);
Remove from Favorites
When the user removes a product from their favorites, use the following implementation of customEvent.
String pageName = 'Add To Favorites';
Map<String, String> parameters = {
  'OM.pf' : productCode,
  'OM.pfu' : '-1',
};
relatedDigitalPlugin.customEvent(pageName, parameters);
Logout
To remove all the user related data from local storage, use the method below.
await relatedDigitalPlugin.logout();
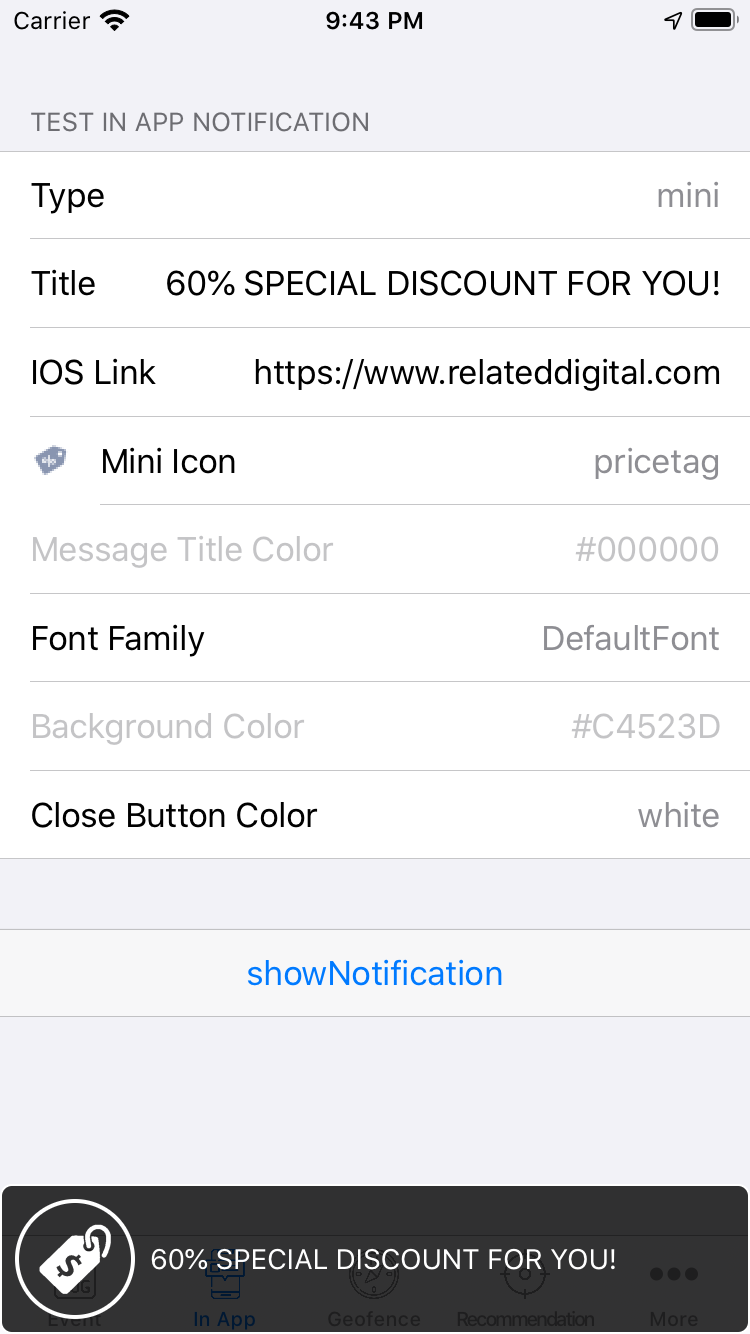
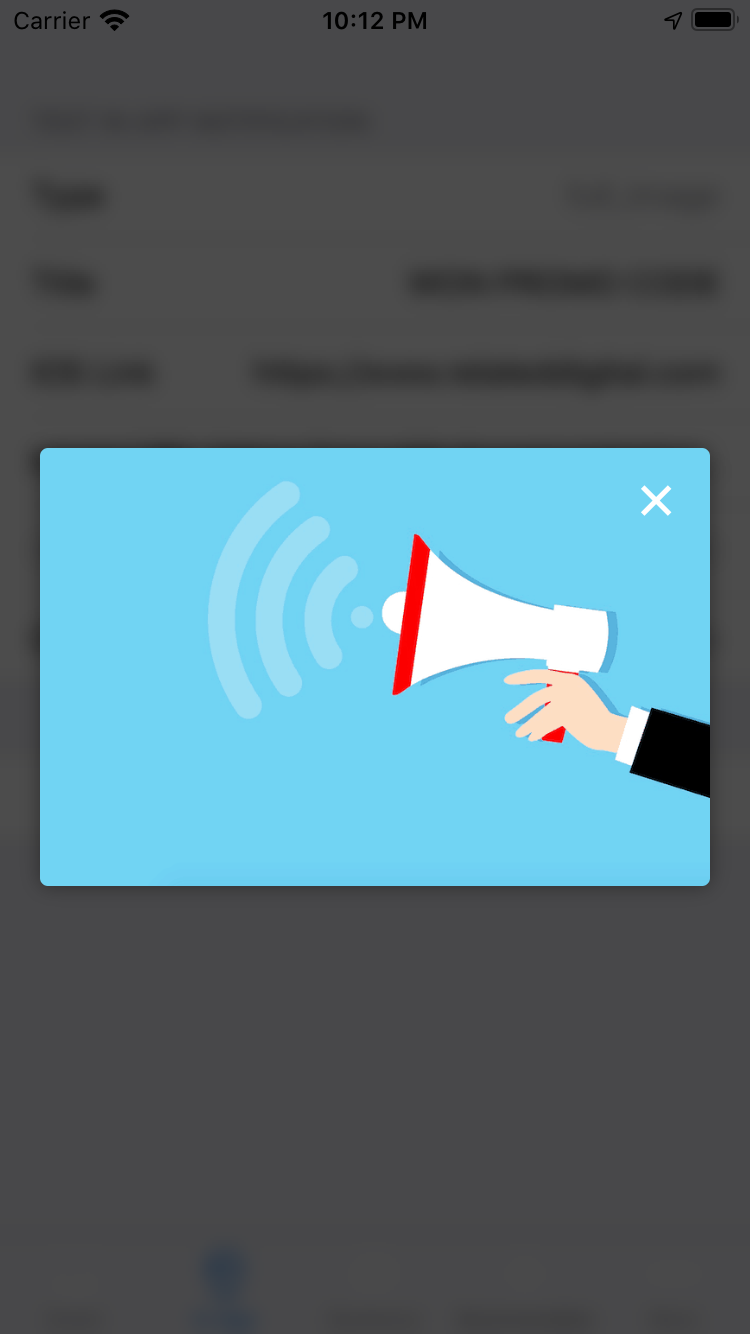
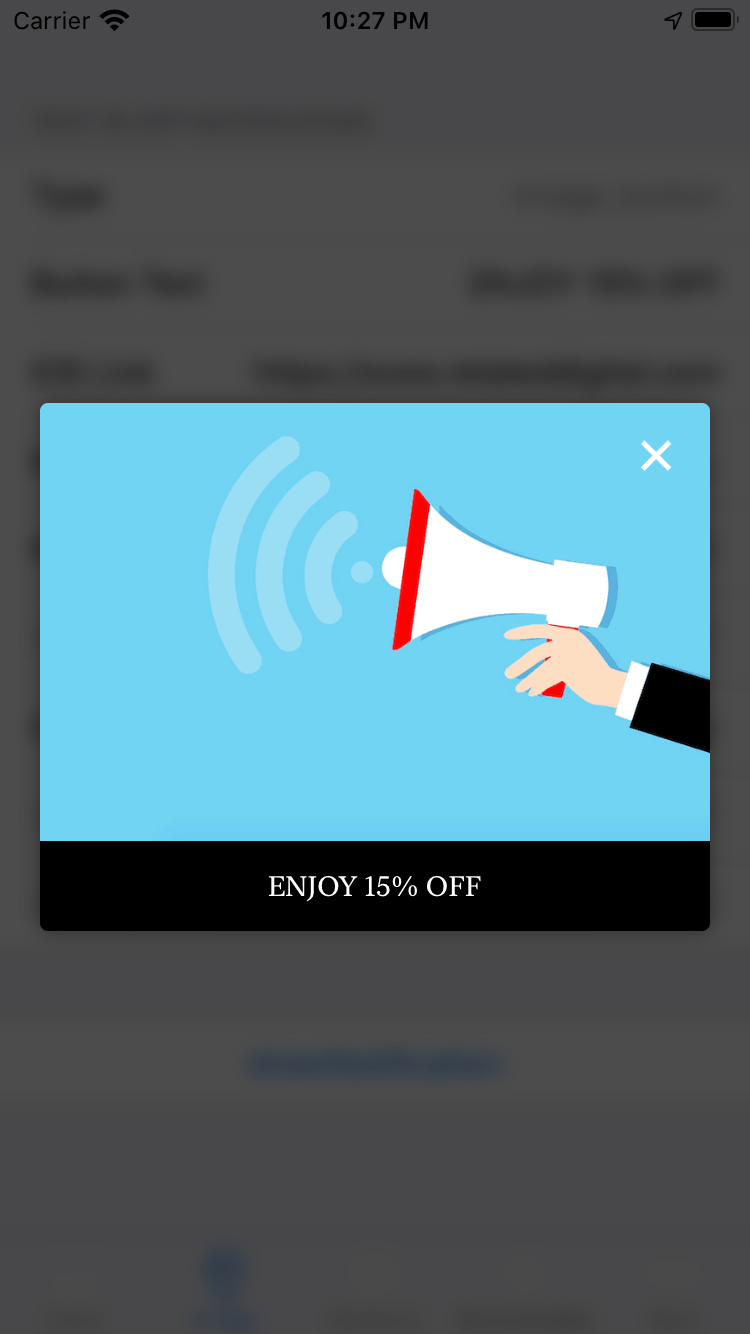
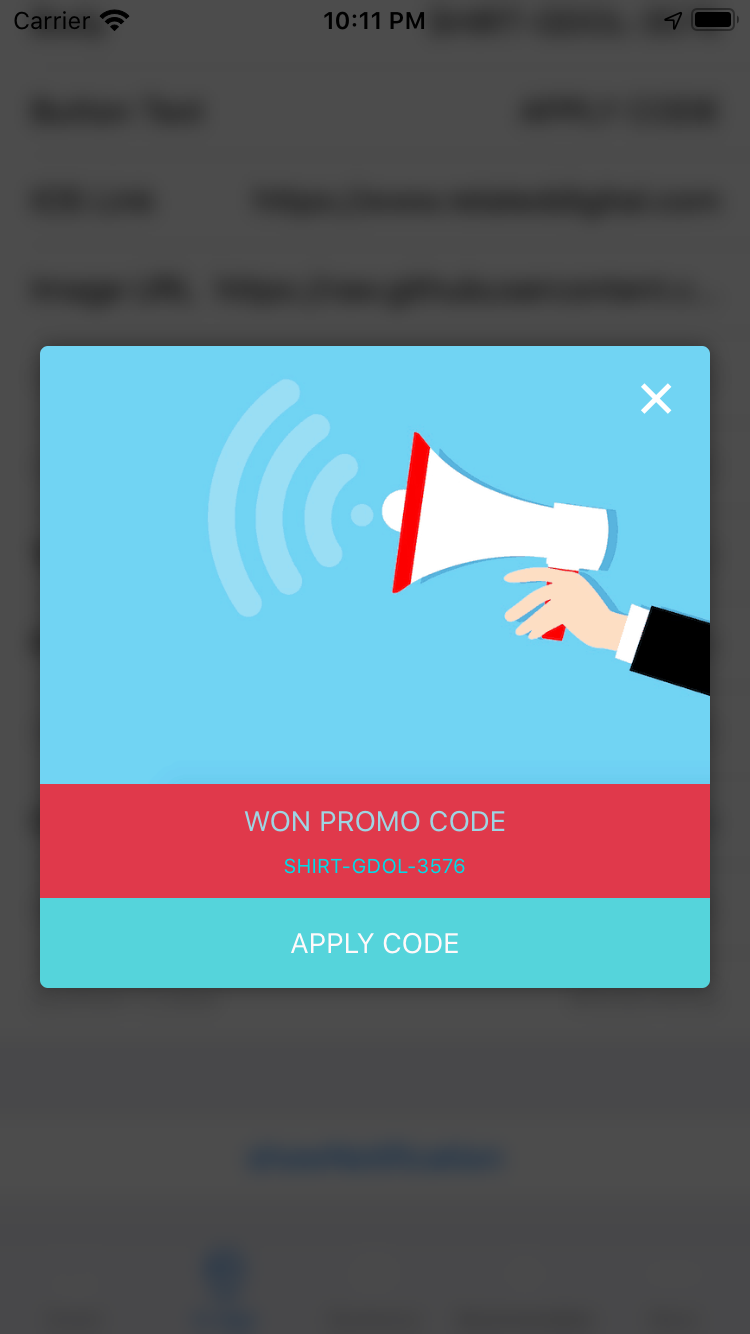
Targeting Actions
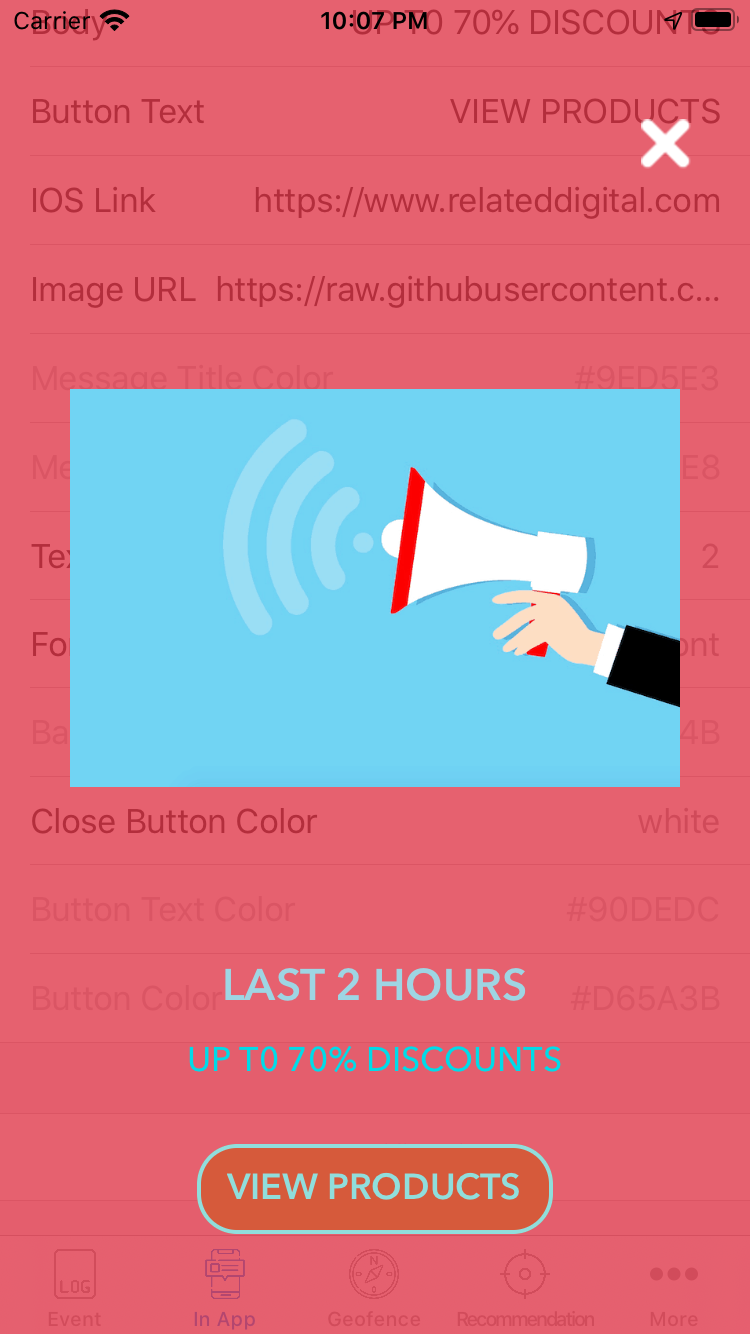
In-App Messaging
In-app messages are notifications to your users when they are directly active in your mobile app. To enable In-App Messaging feature you need to set the value of inAppNotificationsEnabled parameter to true when calling init to initialize the SDK.
The existence of a relevant in-app message for an event controlled by after each customEvent call. You can create and customize your in-app messages on https://intelligence.relateddigital.com/#Target/TargetingAction/TAList page of RMC administration panel.
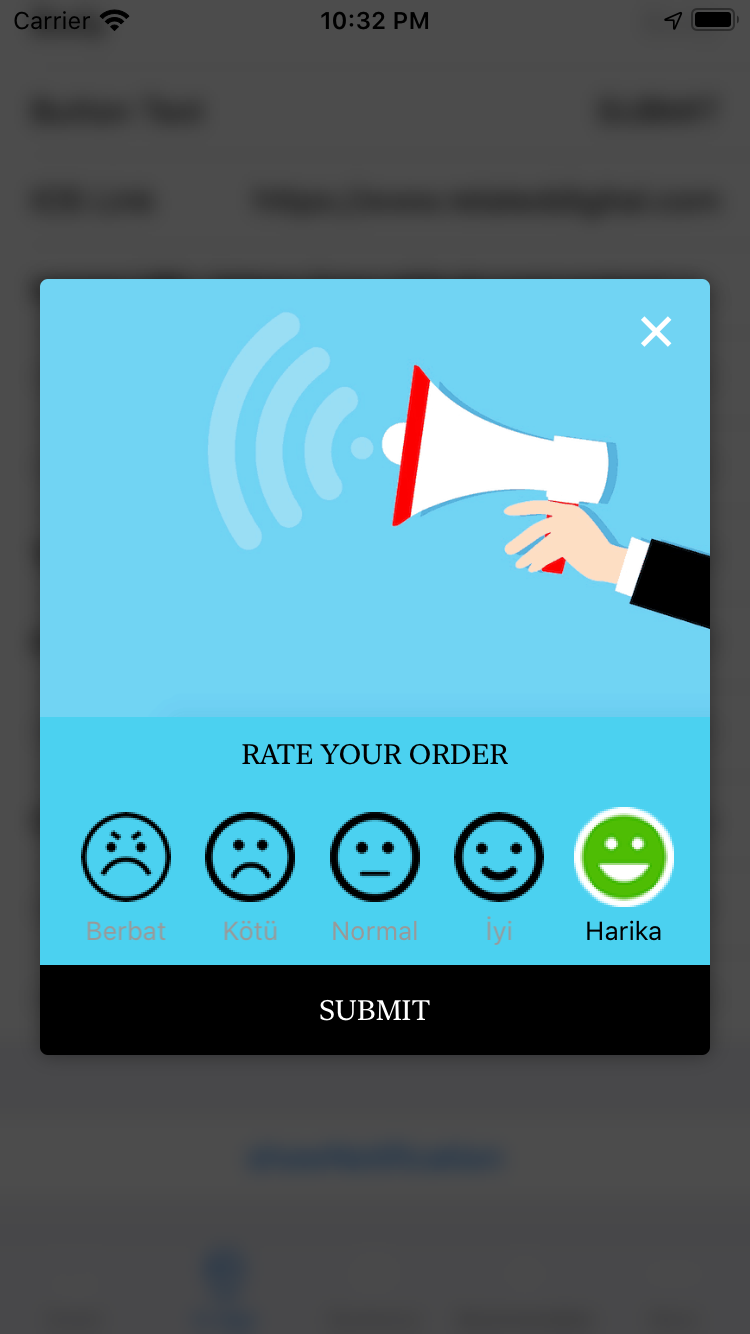
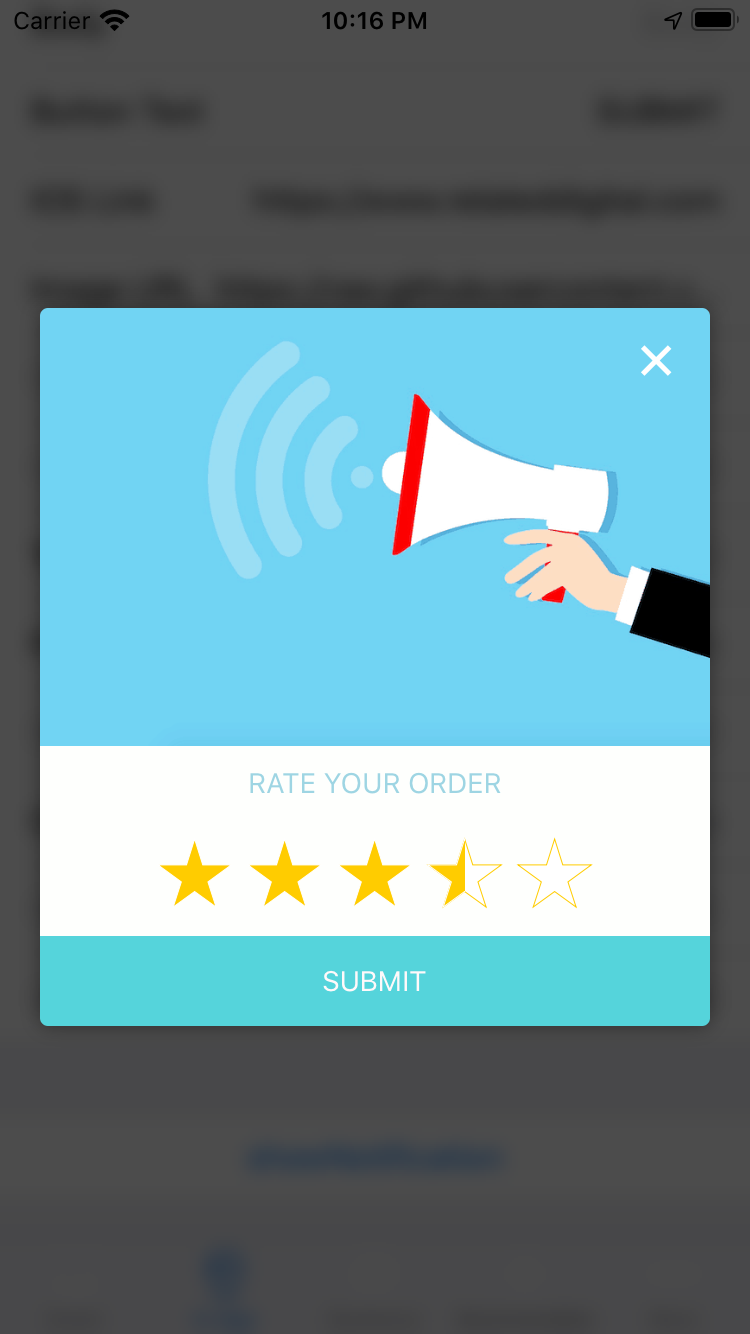
There are 9 types of in-app messages:
| Pop-up - Image, Header, Text & Button | Mini-icon&text | Full Screen-image |
|---|---|---|
 |
 |
 |
| Full Screen-image&button | Pop-up - Image, Header, Text & Button | Pop-up-Survey |
 |
 |
 |
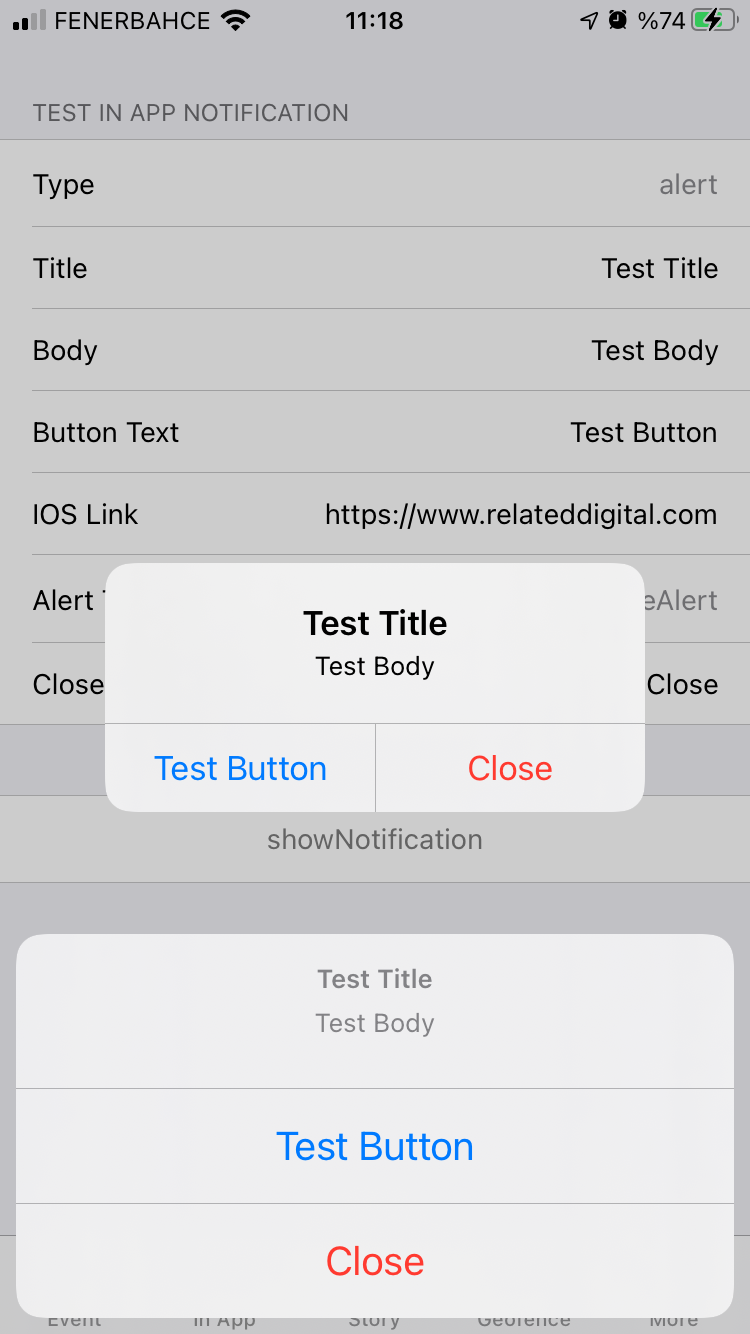
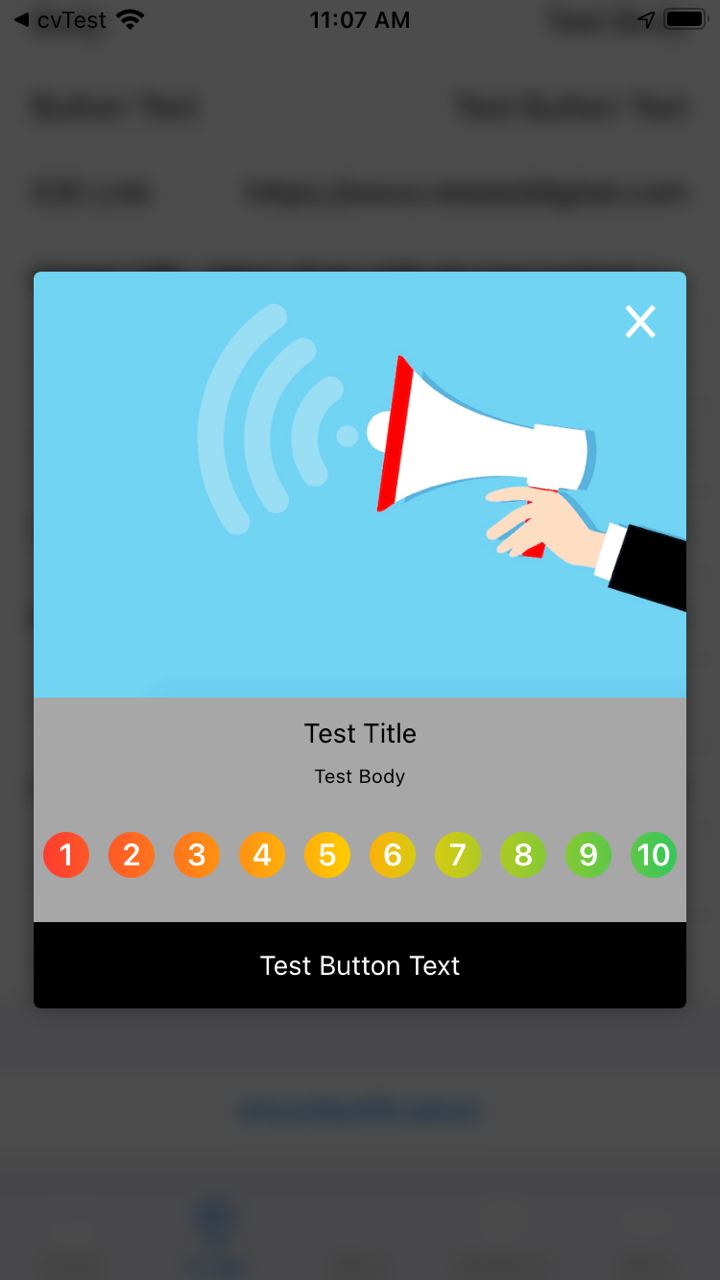
| Pop-up - NPS with Text & Button | Native Alert & Actionsheet | NPS with numbers |
 |
 |
 |
Geofencing
IOS
- In Xcode, add NSLocationAlwaysAndWhenInUseUsageDescription and NSLocationWhenInUseUsageDescription keys to the Info.plist file.
- In Xcode, enable Background fetch and Location updates background modes.
- When initializing plugin, set geofenceEnabled to true. Also provide a number for maxGeofenceCount parameter (max. 20 supported).
Android
- Add below permissions in your AndroidManifest.xml
<uses-permission android:name="android.permission.ACCESS_FINE_LOCATION"/>
<uses-permission android:name="android.permission.ACCESS_COARSE_LOCATION" />
<uses-permission android:name="android.permission.ACCESS_BACKGROUND_LOCATION" />
- Add below service and receivers in your AndroidManifest.xml
<service android:name="com.visilabs.android.gps.geofence.GeofenceTransitionsIntentService"
    android:enabled="true"
    android:permission="android.permission.BIND_JOB_SERVICE" />

<receiver android:name="com.visilabs.android.gps.geofence.VisilabsAlarm" android:exported="false"/>

<receiver
    android:name="com.visilabs.android.gps.geofence.GeofenceBroadcastReceiver"
    android:enabled="true"
    android:exported="true"/>
Recommendation
Use getRecommendations method as below to retrieve product recommendations. This method takes mandatory zoneId and productCode parameters with optional filters parameter.
import 'package:relateddigital_flutter/recommendation_filter.dart';

Future<void> getRecommendations() async {
  String zoneId = '6';
  String productCode = '';

  // optional
  Map<String, Object> filter = {
    RDRecommendationFilter.attribute: RDRecommendationFilterAttribute.PRODUCTNAME,
    RDRecommendationFilter.filterType: RDRecommendationFilterType.like,
    RDRecommendationFilter.value: null
  };

  List filters = [
    filter
  ];

  List result = await widget.relatedDigitalPlugin.getRecommendations(zoneId, productCode);
  // List result = await relatedDigitalPlugin.getRecommendations(zoneId, productCode, filters: filters);
  print(result.toString());
}
App Tracking
(Android Only)
Use sendTheListOfAppsInstalled method to track installed apps on android.
await widget.relatedDigitalPlugin.sendTheListOfAppsInstalled();
Add one of the sections below to your AndroidManifest.xml in order to use this feature.
Option 1
<manifest package="com.example.myApp">
    <queries>
        <package android:name="com.example.app1" />
        <package android:name="com.example.app2" />
    </queries>
</manifest>
Option 2
<uses-permission android:name="android.permission.QUERY_ALL_PACKAGES"
tools:ignore="QueryAllPackagesPermission" />