Fast.cli
An incredible Command Line interface for Flutter. It allows you to create your own CLI without coding a line.
With this CLI, you can create your custom templates and define how your project will start.
The generated directories and files are defined from the outside in, that is, the users define the resources, the CLI generates for you.
You can easily:
- Create
- Use
- Edit
- Share
Do not hesitate to share the plugins created by you with the community, it is very simple.
Features
- Templates generator
- Aplication Scaffold generator
- Snippet generator for Visual Studio Code
- Custom commands
- Standard line commands (Some commands already included in the CLI)
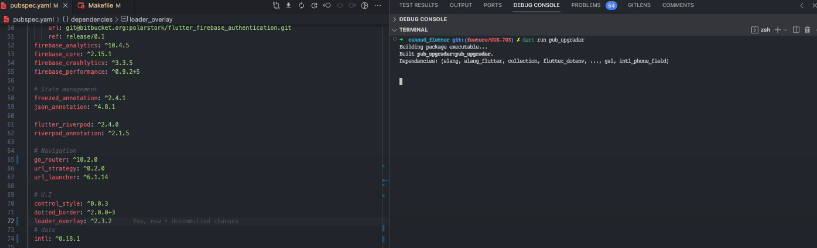
- install (Add a package to the project dependencies)
Install
First of all it is necessary to install the package and configure cache location.
Install this package globally
To do this, you must have the Dart SDK installed and configured
See the guide referring to the installation of packages globally if you have any doubts on how to do it.
$ pub global activate fast
Configure cache location
Add the fast cache to your PATH environment variable.
$HOME/.fastcli/bin/
Overview
- Plugin System - Provide the mechanism for you to import a set of templates, resources and custom commands.
- Custom Commands - Commands defined by you to be executed in cmd.
- Scaffold - An initial structural for a project(Start your project with a structure already defined)
- Template - (Code that will be created for your project, as if it were a snippet, but by command line)
Quick Start
Quick use of CLI features.
Install your first plugin
The plugin system is the way in which you can create, use and share your own resources. Think of them as plugins for VS Code, but in this case for a CLI.
To use the CLI it is necessary to install at least one plugin, so install your first plugin with the command below.
Don't worry, just below you will learn how to create your own plugin. For now just install this plugin already created.
fast plugin add <repository that has a plugin>
Example:
$ fast plugin add git https://github.com/pbissonho/mvc_git_test.git
See what the plugin provides
After installing the plugin, an executable is created with his name, so run the command below to test.
Use the "mvc" plugin that was installed directly from the repository.
This command will display the functionalities that the plugin provides.
$ mvc --help
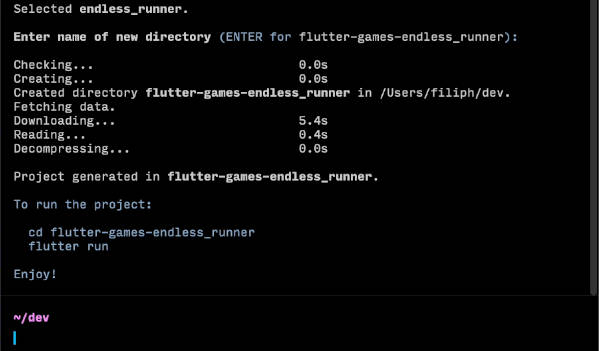
Use a plugin scaffold
<plugin_name> create --name <flutter_projet_name> --scaffold <_scaffold_name>
Create a flutter application called "myapp" with the structure defined in the "sample" scaffold of the "mvc" plugin
Example:
$ mvc create --name myapp --scaffold sample
Run a plugin custom command
mvc run <custom_command_name>
Example:
$ mvc run build
Use a plugin template
mvc <template_name> <template_arg1> <template_arg2> <template_arg3>...
$ mvc page --name myPage
Plugin System
The plugin system is the way in which you can create, use and share your own resources. Think of them as plugins for VS Code, but in this case for a CLI.
This CLI is intended to provide the tool for you to create your own CLI, by default the CLI comes with no resources, that is, it does not have any available plugin, command or scaffold. So to use it is necessary to install at least one plugin.
No VS Code os plugins can provide snippets, themes, icons and other things.
In this CLI the plugins provide:
- Commands
- Scaffolds
- Templates
Structure of a plugin:
scaffolds/ <- Folder to add the scaffols.
templates/ <- Folder to add the templates.
commands.yaml <- File to define custom commands
plugin.yaml <- File to define the name and description of the plugin.
See an example on github clicking here..
Using a plugin
Fisrt instal the plugin. You can install directly from a repository.
When adding a plugin an executable is created with the name of the plugin, so after installing it it is possible to use it by the plugin's own name.
Install:
$ fast plugin add git https://github.com/pbissonho/mvc_git_test.git
Use:
$ mvc --help
Plugin Commands
add
Add a plugin
It is possible to add a plugin directly from a github repository or some local path.
Install directly from a repository.
$ fast plugin add git https://github.com/pbissonho/mvc_git_test.git
Install from a local path.
$ fast plugin add path home/mypath/
remove
Removes a plugin.
$ fast plugin remove --name <plugin_name>
list
Show all installed plugins.
$ fast plugin list
Scaffold
A scaffold is a yaml file where you can define a folder structure and a set of dependencies for a Flutter project.
Instead of creating a blank Flutter project, you can start the project with a folder structure already created and the dependencies configured.
Define a scaffold.yaml
To define your scaffold just follow the example below:
file: scaffold.yaml
# The scaffold name.
name: sample
description: A sample scaffold.
author: Pedro Bissonho <[email protected]>
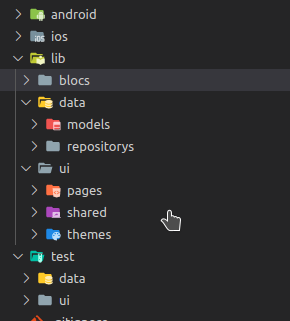
# The folder structure that will be generated inside the 'lib' folder.
structure:
- ui:
- pages
- shared
- themes
- data:
- models
- repositorys
- blocs
# The folder structure that will be generated inside the 'test' folder.
test_structure:
- ui:
- data:
- fixtures:
# The standard dependencies that the project will have.
# Your project will start with all these dependencies.
# If the version is not informed, the version will be configured as the last version available in Dart Pub.
dependencies:
koin:
flutter_bloc:
# The standard dev_dependencies that the project will have.
# If the version is not informed, the version will be configured as the last version available in Dart Pub.
dev_dependencies:
koin_test:
Use a scaffold
Add your scaffold.yaml file inside a plugin and then use it.
<plugin_name> create --name <app_name> --scaffold <scaffold_name>
Example:
$ mvc create --name myapp --scaffold mvc1
Result
When starting your project with the sample scaffold you will have that project as a result.
Template
Templates are files or a set of files that you use to generate code. Generate code as snippests, but by command line.
Define a template
First we define the files that are generated.
In this example, the '@Name' tag will be replaced by the '--name' argument when the file is generated.
file: @name_page.dart
import 'package:flutter/material.dart';

class @NamePage extends StatefulWidget {
  @override
  _@NamePageState createState() => _@NamePageState();
}

class _@NamePageState extends State<@NamePage> {
  @override
  Widget build(BuildContext context) {
    return Scaffold(
      body: Container(
        child: Text("Hello"),
      ),
    );
  }
}
In the same folder as the file above we have the yaml file that defines how the template should be created.
file: template.yaml
#Yaml file for configuring the template.
#The template name
name: page
#The template description
description: Create_flutter_page.
#Path where files should be sent
to: lib/ui/pages/@name
#Arguments to be passed when executing this template
# You can define as many arguments as you want.
args:
  - name
# - other1
# - other2
# - other3
Using a template
Run this command so that your template is generated.
<plugin_name> <template_name> <templates_arg1, templates_arg2, templates_arg3...>
example:
$ mvc page --name home
Result
You will now have the following file in the path lib/ui/pages/home
import 'package:flutter/material.dart';

class HomePage extends StatefulWidget {
  @override
  _HomePageState createState() => _HomePageState();
}

class _HomePageState extends State<HomePage> {
  @override
  Widget build(BuildContext context) {
    return Scaffold(
      body: Container(
        child: Text("Hello"),
      ),
    );
  }
}
Snippets generator
A command to generate snippets for the VC Code based on the template files.
Reuse the code inserted in the template files to generate snippets for Visual Studio Code.
Define your snippets
First we create the template file and template.yaml.
And then set a snippe to be generated.
file: @name_page.dart
import 'package:flutter/material.dart';

class @NamePage extends StatefulWidget {
  @override
  _@NamePageState createState() => _@NamePageState();
}

class _@NamePageState extends State<@NamePage> {
  @override
  Widget build(BuildContext context) {
    return Scaffold(
      body: Container(
        child: Text("Hello"),
      ),
    );
  }
}
file: template.yaml
name: page
description: Create_flutter_page.
to: lib/ui/pages/@name
# You can define as many arguments as you want.
args:
  - name

# Set up a list of snippests.
snippets:
  # The file containing the snippet code to be generated
  # Reuse the code inserted in one of the template files to generate a VC Code snippets.
  - file: '@name_page.dart'
    prefix: page
    #File lines that will not be included in the snippet.
    excluded:
      - 0
      - 1
# It is possible to create snippests for each template file.
# - file: '@name_other1.dart'
#    prefix: other1
#    excluded:
#      - 0
# - file: '@name_other2.dart'
#    prefix: other2
#    excluded:
#      - 0
Generate snippests
Snippests are generated only for the called plugin, so
if I had more snippes installed they will not be generated for them.
Run the command below to generate the snippets.
<plugin_name> snippets
Example:
$ mvc snippets
Result
It will be possible to use the generated snippet.
Custom Commands
Recording and having to write commands like 'flutter build runner build' it's not a cool thing to do.
,so the custom commands will solve this problem. Write only once and then use them for an alias.
You only need to create a commands.yaml file in your pluginand define your commands.
Define your commands
file: commands.yaml
commands:
  runner: flutter build runner build
  push: git push origin master
  mkdir: mkdir myFolder
Running a command
<plugin_name> run <command_name>
example:
$ mvc run runner
Migrating
v0.3 to v0.4
The commands "config template",'config scaffolds' and 'config commands' have been removed. It is now much easier to configure the CLi and start using it. Just create your plugin and install it.
The scaffolds, templates and commands remain exactly the same, so you will use version 0.4 without making any changes, just add them to your plugin.